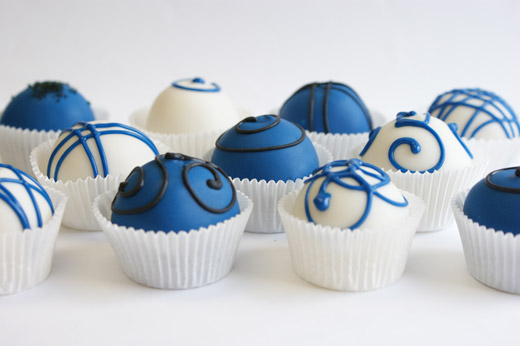
You may remember back in March I had a huge cake ball project.
HUGE, as in 2000+ cake balls!
That’s roughly 55 regular sized cakes (9×13″ pans).
Or about 12 full sheet cakes! Plus a whole lotta frosting.
Not to mention about 66 POUNDS of CANDIQUIK! Holy moly.
These cake bites fed the guests that attended the 2012 Taste of the Timberwolves, a benefit dinner supporting the Timberwolves FastBreak Foundation.
A unique and great opportunity!
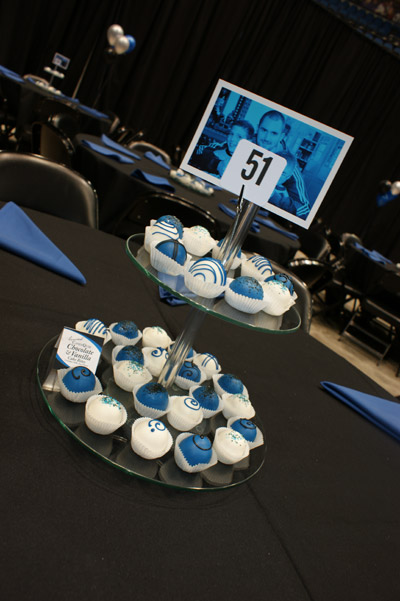
The pictures below will give you an inside peak at what “Operation 2k Cake Balls” looked like!
First things first, the tools:
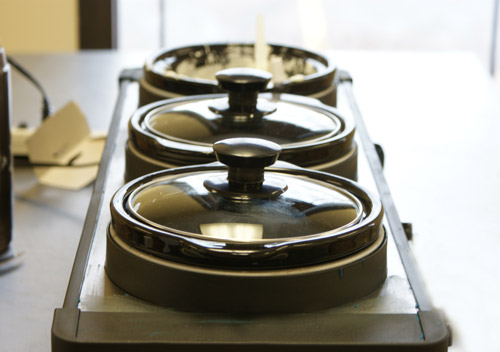
I did not melt the CandiQuik in the crock pots (I used the microwave, then poured the coating in the pot) - these crock pots would take longer than desired, plus, if you leave the crock pot on too long it can scorch the coating. I simply kept it on the “warm” setting for about 10 minutes and then would turn it completely off (it WILL scorch the coating if it is left on too long). Toggling between these two settings worked great!
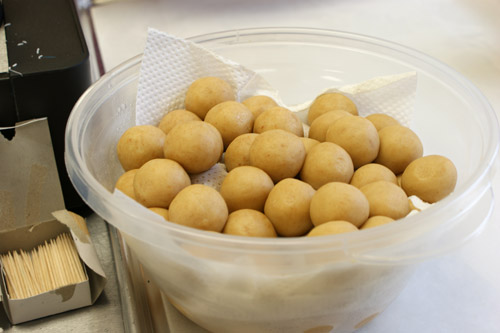
buckets upon buckets of cake balls.
I put the bowls of rolled cake balls in the fridge (for the ones that would be used soon) and freezer (for ones I would dip later). I then pulled the ones in the freezer out to defrost shortly before dipping…since they were cake balls (not pops), I was able to dip them while they were still very cold (without any cracking).
Please note: I did not keep these in the freezer for very long. Maybe 30 minutes, then I would pull them out and put them in line to get dipped.
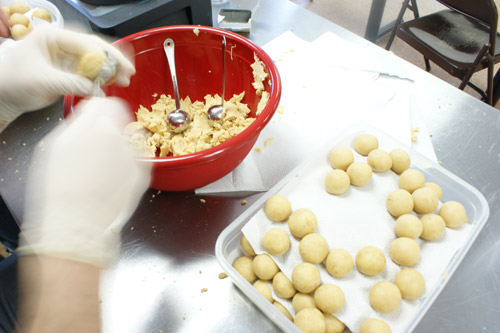
we had “rollers” and “dippers”
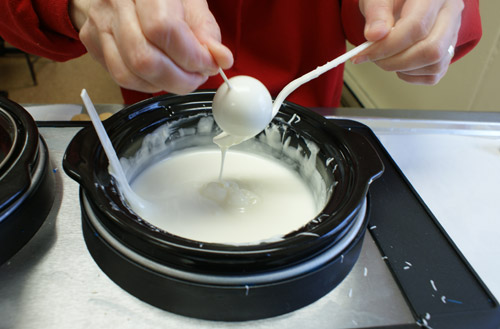
two people shared a dipping pot.
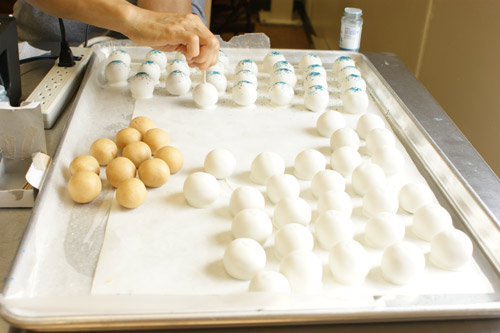
I used a toothpick to dip the cake balls and pulled it out while the coating was still wet.
some cake balls got sprinkled, others were set aside to be piped.
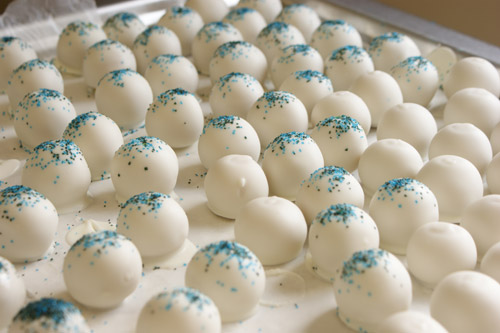
yellow cake was coated in vanilla candiquik.
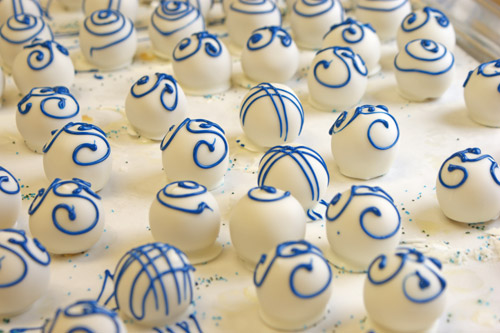
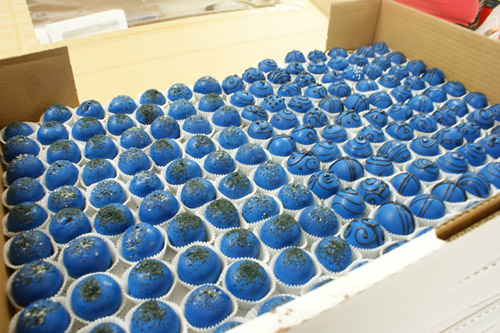
chocolate cake was coated in this blue candiquik (I dyed all of the coating in advance… 30+ pounds of it!)
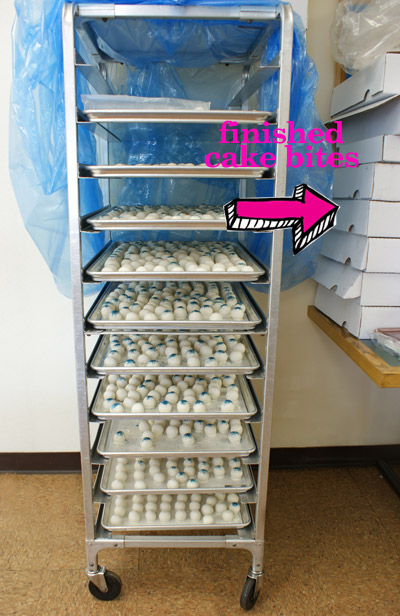
once a sheet was full we transferred them to this rack. Completely finished cake balls (decorated, trimmed of any excess coating, & placed in mini muffin cups) were placed in these large boxes.
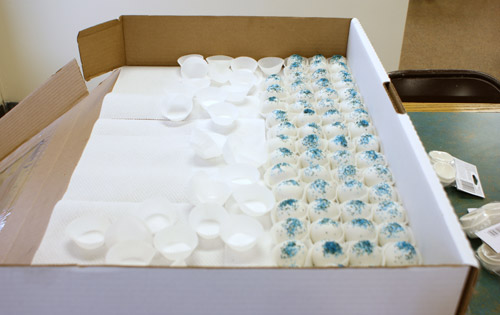
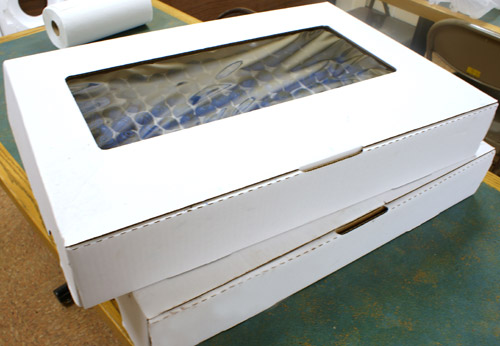
each box held about 180 cake balls.
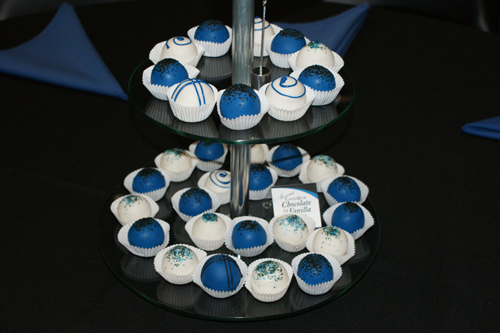
We completed all of the cake bites in five days.
The blue cake bites were done in the first two days and the white cake bites took up the following two days.
Piping, trimming, & boxing were finished the last day.

If you have never made cake balls/pops, or have had issues (haven’t we all?!), I highly suggest you check out my cake pop tutorial HERE.
How many cake balls have you made for one occasion?!



These are cute. How did you get the cobalt blue color?
Thanks! I used a royal blue food coloring! I love the color they turned out
I made ~1000 pink cake balls for a Breast Cancer Society fund raiser. Great fun – great project! And I did them all myself..
WoW! 1000 cake balls by yourself, quite an accomplishment!
400 is my max. I have an Easy roller and it’s perfect for large quantities but I even use it when making 36. Portion control is exact for each ball, plus the time it saves in hand rolling pays for itself eventually.
What a great accomplishment for you.
400 is still a lot! I have been curious to try that Easy Roller – although if I was going to take full advantage of it, it should have been for this!
WOW. That’s a lot of cake balls. Gorgeous!
The color you use is so beautiful. What brand of food coloring did you use? I am making a caterpillar for an event coming up.
Hi Sam,
Thank you! I used a brand called Colorcon Opatint (LOVE) – I’m not sure they sell to consumer’s, but here is their site: http://www.colorcon.com/products/food-confectionery-products.
I have to make 500 pops in May. I have to make them in Navy Blue and Gold.. What do you recommend so that I can get that navy blue color? Is there a way to get gold and not just yellow.. Your 2000 cake pops look AMAZING… I notice you use a toothpick, isnt that difficult..
Hi Cynthia – I used a brand called Colorcon Opatint – but I’m not sure if they sell to consumers (there is a link to their website a couple comments below). Otherwise, I have heard that CK (Country Kitchens) brand of oil based food colorings work good.
-Gold might be hard to achieve, I would suggest using those edible gold shimmer dusts (sold at craft stores), and stir in the coating – this could get costly though and would take a lot to color the coating. Otherwise, just buy the edible gold shimmer dust, coat your cake pops in the vanilla, let dry, and then use a clean paint brush to apply the gold.
-Dipping in the deep pots with the toothpicks worked awesome!! I had a couple people helping me that had never made cake balls before, and so I needed a foolproof way to dip. Just make sure your cake balls are very cold so they do not fall right off the toothpick (no cracking will occur because they are not staying on sticks) – and then let the excess coating drip off, place on wax paper and twist while pulling up to remove the toothpick. Good luck!! Hope this helps!
So you move the toothpick WHILE chocolate is still wet? do you cover the hole? Look awesome
Yes, remove the toothpick while the coating is wet – remove it immediately upon setting on the wax paper, (twist and pull up, may take a little wiggling) and then use the excess coating on the toothpick to cover the little hole – then sprinkle or pipe with coating (once dry) to cover the hole completely!
I made just over 1000 cake pops for a 3-day show. It was my first show and had no idea what to expect as far as people attending. But Buddy, The Cake Boss was there on the Sunday so it got really packed. I ended up selling every cake pop and I was also picked as the winner for best lollicake category at the show from Buddy! Although making 1000 cake pops was a lot of work and stressful, I’d say it was worth it in the end!
Wow, congratulations!!!
Oh my gosh. These are amazing! So elegant and look delicious
Love this post. Great job on the cake balls!! I just pinned
We actually made 16,500 cake pops for an event back in October. Quite an accomplishment–we even framed our tally sheet!
Thank you! WOW 16,500 is un-imaginable! That would take up some serious space!
you said above that cake balls won’t crack if they are froze but cake pops will, what would be the difference? I have that problem with cake pops all the time and when i make cake balls I only drizzle I don’t dip so I would like to start doing that.
Thanks!
Hi Reyna, the difference is the cake balls are not on a lollipop stick, therefore when you dip them (& let the excess coating drip off) and place on the wax paper there is still room for the cake ball to expand (through the bottom), versus on a stick where the cake is trapped. However, mine were not completely frozen and I just kept them very cold because of the process I was using to make this many cake balls (the toothpick/deep bowl to dip). Usually, when making cake balls (using a spoon to coat them), I can dip them at room temp! Hope this helps.
Hi! These are beautiful! How are you piping the designs on the top? Melted Candiquik in a piping bag with the tip snipped off or some other method? When I try doing the piping with a piping bag and a snipped tip, I get a ribbon of chocolate instead of a nice “tube”. I wonder if it’s the Wilton bags I use or what. Any help is appreciated!
Hi Holly,
I used a ziploc quart freezer bag (to be specific), and I snipped a TINY hole in one end (I poured about a whole package of candiquik in the bag). You have to make sure your chocolate is smooth and flows easily – sometimes if it’s TOO hot, it flows too fast. At least w/ the freezer bags, they are durable and can even be reheated if the coating starts to harden. Practice piping on a piece of wax paper or napkin. Also, I always keep a napkin near by to wipe off the excess CandiQuik between each cake ball. If you find the coating is barely drizzling out, maybe you need a little bit bigger of a hole. If you find that you can’t control the coating, your hole may be too big. The other thing is to make sure you have the right amount of pressure on the bag. I hold mine like I would a pencil, with all of the coating pressed towards the tip. You do have to work fast, but once you get the hang of it, it’s a breeze! Hope this makes sense and helps. Please feel free to ask any other questions! -Sarah
Thanks Sarah! That’s probably my problem, it’s not flowing well, and *blush* I wasn’t using Candiquik at the time. I’ve switched to Candiquik, and we just bought Americolor’s Flo Coat, which allows you to use Americolor’s wide range of gel colors with chocolate. Saves us a bunch of money not having to buy separate oil based colors. I can’t wait to try it out. I saw that you liked my Facebook page, thanks! If you look under cupcakes and see the pumpkin cupcake, the cat on the pumpkin is a cake pop made with chocolate Candiquik.
No problem, Holly! Well hopefully you have better luck with this! I wish I had a video (soon, *crossing fingers*) to demonstrate some of these things! Just to keep in mind, you may need to add a spoonful of Crisco (or any solid vegetable shortening) to thin out the coating once you add the Americolor oil food coloring. Certain food colorings, when added to the Candiquik, tend to make it a little thicker. Take care! -Sarah
Great Pops. Just made some for my daughter’s wedding. They were beautiful. Now, I have more tips to use for the future. Looking for another way to melt the candy, are your crock pots regular size?
Hi Sherry, the crock pots I used were the smaller sized ones – you could use a large one, but it would take quite a bit of candiquik to fill them (and you want it to be deep enough to dip in, so you don’t hit the bottom with the cake ball). The small one held 3-4 packages of candiquik!
oh my! really really nice!!! what to do?
i’ve got a problem.. at first I thought its cuz i didnt freeze them enough so there were crumbs falling into the chocolate and made the surface lumpy.. but after freezing them and dipping … there was condensation on the cake ball and obviously ruined the chocolate
Hi Pris,
It sounds like your cake and frosting were not mixed together quite well enough…also, try trimming the edges off of your cake before mixing with frosting. I have a tutorial on common cake pop problems, check it out here: http://blog.candiquik.com/?p=3020 ! Also, yes, if you freeze them, make sure you let them thaw a bit, and wipe them off with a paper towel! If you don’t need to, don’t freeze them – just store in the fridge
Hope this helps, let me know if you have any other questions.
Sarah
Hi Sarah, amazing that I found your post! Congrats on such a huge accomplishment. Ive been asked to make 2000 cake pops (individually wrapped) for a Christmas party this year and I’m trying to quote. Do you mind me asking what you charged? I dont want to lose the job but I also want to make sure I cover my costs. Feel free to email me. Thanks
Jaime
The sassy lamb
Hi Jaime – Wow! That will be a huge job…hopefully you have help! I actually don’t have a cake business and this was done through a charity event. Typically (from what I’ve seen) – people charge around $2/cake ball/pop…give or take. More $ for the highly detailed ones…less for bulk, same flavor, little detail. The *cheapest* I’ve personally seen is $17/dozen. Hope this helps!!
Wow! 2000 cake balls! I was shocked when I made 150 cake truffles for a baptism…but 2000?! You’re way too awesome!
Hi Emily! 150 is still an accomplishment! Thanks for stopping by
I have read every response and have learned so much from everyone. This is all new to me since I decided to make some 200 cake balls for Halloween and were a hit that has now turned into a small side business. Almost every issue you all have mentioned I have experience and just want to say thanks for the ideas. I have orders for 8 dz over the next month of various colors and Christmas. I use Wilton candy melts and do add about a teaspoon of Crisco to thin them but it still seems thick am I not using the correct melts. I have tried white cholate melts and they seemed to stay tacky and not become solid. Any help will be welcomed. Thanks Tonia in Tx
Hi Tonia, Here is a blog post of mine that addresses common cake pop issues, including thick coating (http://blog.candiquik.com/?p=3020). Thanks, hope this helps!
I would suggest trying CandiQuik Coatings (can be found at Walmart, Target, etc.) in the baking aisle. It will change your world compared to the candy melts which are thick and hard to dip with.
Hi Sarah, Your cake pops are beautiful. How do the CandiQuick coatings taste? I want to try them. Thanks. Kathy
Hi Kathy,
thank you so much! Comments like yours make my day. The Candiquik coatings are my favorite (honestly). Log House Foods (maker of Candiquik) makes an almond bark also, but the Candiquik is the premium product – they use finer sugar particles, more cocoas, more milk products – all of this gives the coating a smooth, creamy, delicious taste. (I know sometimes candy melts, barks, etc. can be less tasty than desired, but please – try the Candiquik, you’ll be impressed!)
Happy Thanksgiving!
Sarah