
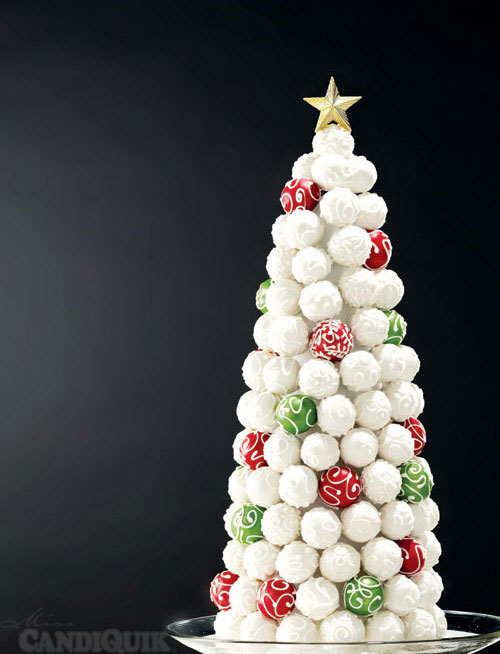
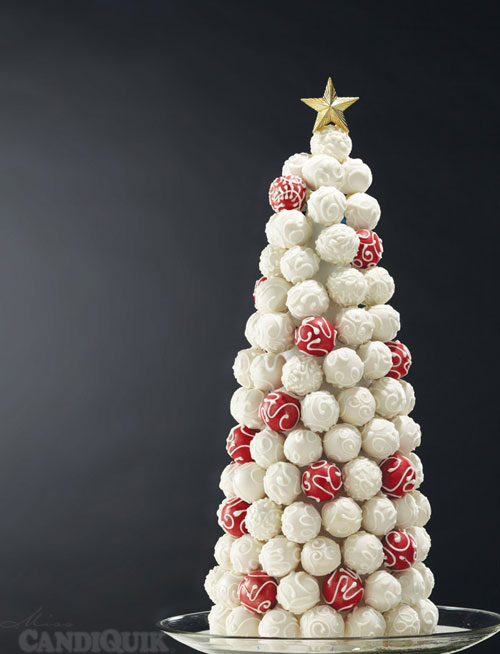
This tree has to be one of the most elegant and awesome desserts I’ve ever made!
I won’t lead you on, it was a bit time consuming. I would highly suggest breaking it up into a 2-3 day project. Make your cake pop mixture on day 1. Coat and decorate your cake pops the following day and construct the tree on the 3rd day. And if you’ve never made cake pops - start here.
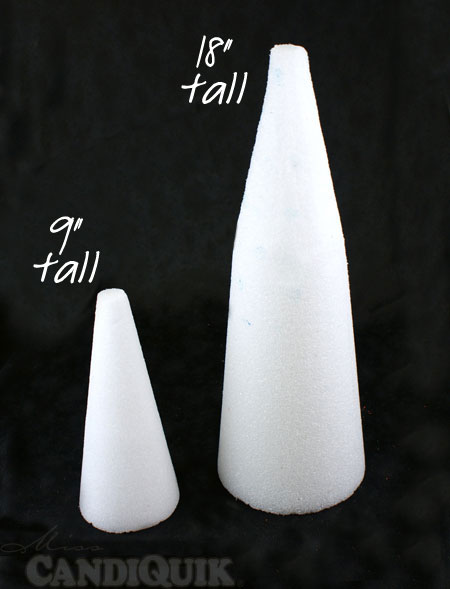
This tree was approximately 18″ tall. You could certainly downsize and make a mini tree.
Let’s get started, we have a lot to cover here!
- 4 packages (16 oz) Vanilla CANDIQUIK® Candy Coating*
- 2 boxes cake mix (plus ingredients for cake mix)*
- 1 (16 oz) container frosting
- Lollipop sticks
- Styrofoam block (to set cake pops in while drying)
- Styrofoam cone (can be found at your local craft store (ex: Michaels))
- Pastry bag + extra coating for piping on designs (note: a plastic bag w/ one corner sniped off can be used to pipe)
- Assorted sprinkles, pearl dust (optional)
- Optional: Assorted food colorings (oil or powder based only)
- Prepare and bake cake mixes as directed on box; cool completely.
- Crumble both cakes into a large bowl. Add frosting and mix thoroughly.
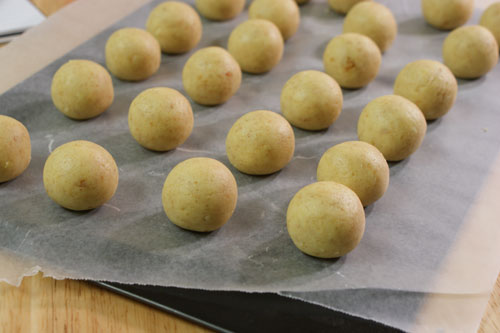
- Roll mixture into 1″ sized balls. Chill for approximately 1-2 hours in the refrigerator.
- Melt CANDIQUIK® Coating in Melt and Make Microwaveable Tray™ according to directions on package.
- Insert a lollipop stick into each cake ball. Dip cake pops in CANDIQUIK®; allow excess coating to drip off. Place in Styrofoam block to set.
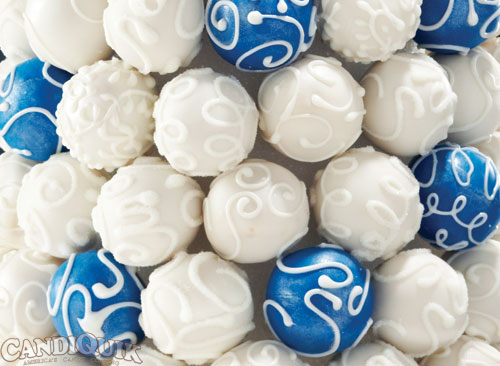
- Decorate cake pops as desired with candy coating and/or icing and sprinkles.
- Once completely dry, carefully remove the cake ball from the lollipop stick. Insert a toothpick in the Styrofoam cone and press the cake ball on the end of the toothpick. Repeat until entire cone is filled with cake balls. (By dipping the cake balls on a lollipop stick, this ensures the cake ball is perfectly round and will sit flush against the cone.)
You will need:
Yields (1) 9″ Tree
Ingredients:
- 4 packages (16 oz) Vanilla CANDIQUIK® Candy Coating
- 2 boxes cake mix (plus ingredients for cake mix)
- 1 (16 oz) container frosting
- Lollipop sticks
- Styrofoam block (to set cake pops in while drying)
- Styrofoam cone (can be found at your local craft store (ex: Michaels))
- Pastry bag + extra coating for piping on designs (note: a plastic bag w/ one corner sniped off works fine too!)
- Assorted sprinkles and edible pearl dust (optional)
- Optional: Assorted food colorings (oil or powder based only)
Instructions:
1. Prepare and bake cake mix as directed on box. Trim the crisp edges off for a smoother cake ball mixture.
2. Crumble cake into a large bowl. Add frosting and mix thoroughly. It may be easier to use your hands to thoroughly mix.
3. Chill mixture approximately 2 hours in the refrigerator (you can speed this up by placing in the freezer).
4. Roll cake mixture into 1” sized balls (note: if you are using a smaller styrofoam cone for your tree, make the cake balls slightly smaller); place on a wax paper lined baking sheet. Insert a lollipop stick into each cake ball. Chill for another 15 minutes in the refrigerator.
5. Melt CANDIQUIK® in tray according to the package directions.
6. Remove a few cake pops at a time from the fridge and dip in melted CANDIQUIK; allow excess coating to drip off and place in Styrofoam block until set. (Note: if decorating with sprinkles, apply while coating is still wet.)
7. Once completely dry, use a pastry bag filled with candy coating to pipe designs on the cake pops.
*Creative Edibles By Yuki offers a great video tutorial on piping!*
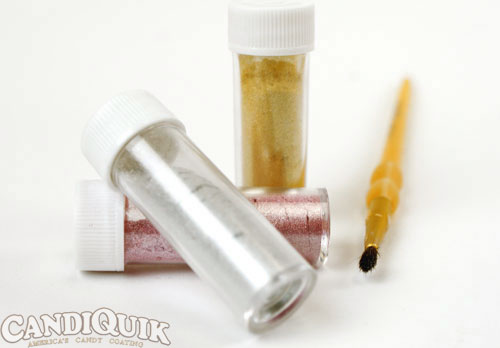
As you can see the cake bites have a shimmer to them!
I used pixie dust a.k.a. edible shimmers. Pearl Dust to be exact. (This stuff rocks.)
It’s like cake pop blush. I felt like a make-up artist giving these pops a little shimmer.
(I used the silver dust on the blue tree and the gold dust on the red and red/green tree)
8. Once completely dry, carefully remove the the lollipop stick from the cake ball (slightly twist the stick and pull out).
Place your styrofoam cone on a cake tier or plate (much easier if you have to move)!
Insert a toothpick (broken in half) into the Styrofoam cone (pointing slightly up). Press the cake ball on the toothpick. Work from the base of the tree towards the top.
I can’t decide which one I like best. It might have to be the blue though. What do you think?!
TIPS:
-
Depending on the size of your Styrofoam cone, the number of cake balls required will vary. To create the large (18″) tree (as used in the pictures in this post), I used approximately 120-130 cake balls, or about 3 cakes worth, plus approximately 6 packages of CandiQuik.
- If you plan on keeping the cake ball tree on display for more than a few days, I would suggest filling the hole (formed by pulling the lollipop stick out) with extra coating to “seal” the cake in better.
- If cake balls become too soft or do not hold their shape while being dipped, return to the refrigerator for an additional 20-30 minutes.
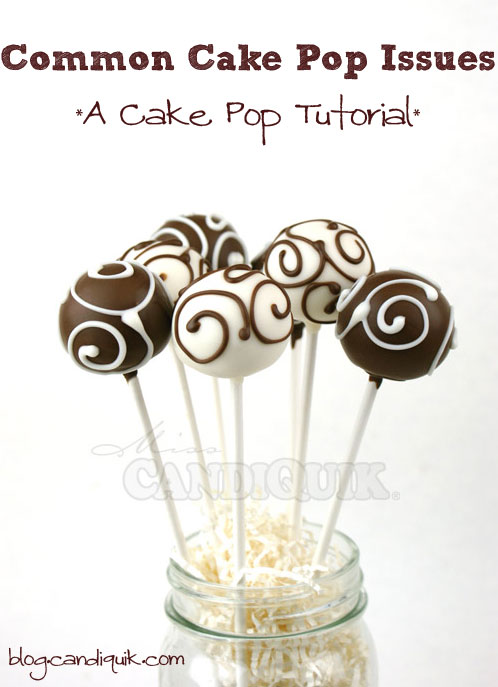
- If you need tips on cake pops be sure to visit my common cake pop issues & tutorial post HERE!


New to the site and all I can say is WOW…I’m in trouble!
Absolutely stunning!
Beautiful! Thanks for the tutorial.
This is lovely! Do you have any pictures of assembling the cake tower with the toothpicks? Also, do you have to use the lollipop sticks or could you just dip and make cake balls without having to later pull the stick out? When people are ready to eat one, do they pull cake ball off of toothpick and leave toothpick on c
one or does the toothpick come out with the cone
I have heard some people cover the entire cone with chocolate – did you put any chocolate or any other type of wrap (cling wrap or paper) on the cone first? Thanks, M
Hi Margaret,
I do not have photos of the process where inserting the toothpick. You could make the cake balls (vs pops) but it would not look as nice because cake pops are more rounded than cake balls (cake balls tend to have a “foot” and will not press as nice against the styrofoam cone). Also, usually when you pull the cake ball off, the toothpick stays in the styrofoam. I did not coat the styrofoam in chocolate as the chocolate would crack when you insert the toothpicks in. You could cover it in plastic wrap if you are worried about the styrofoam touching the cake balls. Hope this helps! Thanks for stopping by! -Sarah
I made this last year, i used the large styrofoam cone covered with blue and white cake balls then placed it on top of a two tier round cake, it was about 3 feet tall, everybody loved it.
Simply Beautiful! Just curious as to how many 9 x 13 cakes it will take to complete the 18 inch tree. Thanx!
Hi CeeJay,
It took about 130 cake balls to fill the large cone, so that would equal about 3 cakes worth of cake balls!
Hope this helps. Thanks, Sarah
This is one spectacular cake! I am afraid it will take me forever to make it if I decide to make something like that.
Hi Julia,
Thanks so much!! You can do it – just break it up and tackle it over a few days! Good luck
wow, this is GORGEOUS! Cake pop heaven :-). You never seize to amaze, Sarah!
Thank you very much!! It made a gorgeous centerpiece.
That is just stunning!!! Just wondering…how much would you sell that for? We have an order for a tree with 50 and we have no clue what to charge. Thanks for your help.
Hi Lily,
That is difficult to decide. I know most cake pop shops charge by the amount of detail and work involved. I’ve seen basic cake pops go anywhere from $1.50/each to $4/each; depending on detail, variety of flavors, design, etc. Being that the cone will cost money and these are fairly detailed, I would charge somewhere in the middle there. Hope this helps, sorry I’ve never sold any so…! Thanks for stopping by
What is the star?
Hi Lana,
the star is just an ornament I bought
That is so pretty. It’s a toss up between the two. Love the blue/white, but the green/red is so classic Christmas. Beautiful work!
Thanks, Carrie! Yes, I couldn’t decide either…but I think I love the blue, it is just so classy. Thanks for stopping by!
Stunning! Two questions: How did you adhere the star? Could you add some other chocolate such as Ghiradelli to the candiquick to better the taste?
Thank you for sharing!!
Hi Julie,
I used a dab of coating to attach the star. And yes, you could add some melted Ghiradelli to the Candiquik. However it might ruin the smooth consistency, which in that case you could add Crisco (or any solid vegetable shortening) to thin it out. If you’ve ever tasted the Candiquik though, it does not have that “waxey” taste/texture that you get from many almond barks/coatings/wafers, etc. Thanks for stopping by!
Why does the toothpick have to be broken in half?
Hi Anne, they don’t have to be broken in half towards the bottom, but once you get towards the top you will find the toothpicks hit eachother through the cone if they are that long. Hope this helps, thank you!
Thank you for your quick response! I thought of a couple more questions. First, I ended up w/Wilton candy melt. Do you think that will perform and taste all right? I don’t want to do all this work and it not taste good. Do you think the difference in taste is worth it to make homemade frosting? And last, w/the pearl dust did you mix it w/any kind of liquid or did you paint it on dry?
Thanks so much!
Hi Julie,
I haven’t had luck with the candy melts, melting smoothly – most people end up having to thin them out with Crisco (or paramount crystals) from what I hear. Also, you will notice a taste difference when compared with the Candiquik or a fine chocolate – but it can be used for the same applications! Also, for the homemade frosting in cake pops, I’ve found the taste difference is minor. However, I do prefer certain brands of frosting over others ;). I’ve found buttercream to be my favorite with the pops – depending on the flavor of cake. Just don’t add too much frosting, 1/3 – 1/2 cup is fine! And with the pearl dust, I just brushed it on dry and it worked great (I’ve heard of others mixing theirs with vodka and painting it on). Good luck!
This might be the coolest thing I’ve ever seen–just gorgeous!! I am always so jealous when I see your super-smooth cake pops. I can never get mine looking that pretty. Love, love, LOVE these trees!!
Aww, thank you Ashley!! This tree is probably one of my favorites also
beautiful to look at….but man, i HATE the texture of these things…its like eating sweet raw dough….i’d probably make them just as a centerpiece…but not to eat.
Hi Andrew, thank you! Haha, yes – cake pops/bites/balls are kind of an acquired taste. I’ve found the less frosting I use, the better I like them. And I don’t like the ones you can buy at stores! Thanks for saying hi.
Sarah
Oh my gosh Sarah! I made the tree over to last two days, it was a lot of work but it turned out great! I got to say that candiquick is an amazing product and very pleasant to work with! It is delicious and a of very high quality. Because of it I made peace with cake pops! thank you so much!!
Hi Anne – that’s great to hear!! It is a little (ok, a lot) of work, but turns out gorgeous when complete! Thanks for your comments
I love your creations! I made snowmen cake pops and small Christmas tree cakepops last year. They were good but I still working on perfecting them. Pretty is time consuming. I live in Saint Louis, MO and was wondering where I could purchase Candiquik from?
Hi Tonya – thank you! Your best bet for finding Candiquik near St. Louis, MO is Target, Walmart, Food Giant, or Hen House (with Hen, I would call before driving there to make sure they still have some in stock). Good luck
-Sarah
beautiful, thanks for sharing the how-to! Will putting the cake balls on toothpicks and having that little “hole” there make the balls “leak” the oil or cake like it sometimes does when it’s not completely covered in chocolate? Or does sitting them flush against the cone take care of that?
Thanks!
Hi Maria,
I did not have any problem with them leaking oil (I think having them on the lollipop stick first helps) – just don’t use too much frosting when making your cake ball batter :). Thanks for commenting.
-Sarah
Thanks so much for this tutorial! I have been looking all over on how to get the cake balls to stick to Styrofoam. Your design is beautiful!
Hi Deb! So glad you found the tutorial Thanks for stopping by and commenting.
I made some of these last year, but I made the cones out of rice krispie treats.
Hi Mary, that’s a great idea!
The trees r such beautiful creations and exactly what I was looking for to make for our annual Christmas party with friends next year. We just celebrated and our color theme for next year will be blue so i’ll definitely make the white & blue tree. Our white elephant gift was also a cake pop maker so i believe this will help to make the cake pops without the added frosting. I just hope i can make it look as elegant as yours! Thanks so much for the tutorial. I plan to use candiQuik as well.
Thank you very much, Amy! Good luck with the tree! Merry Christmas