These are my favorite cake bites (balls, pops, whatever) for a couple reasons:
1 Just look at them! A-dorable!
2 I LOVE Ice Cream
I could eat a BOWL every night before bed, & actually… I used to. Seriously, every night. Ask my mom. Had to knock that off though, you know how it is.
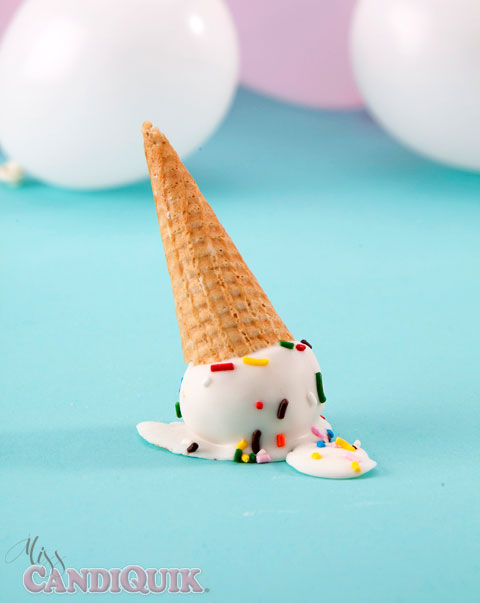
How cool are these though – cake! Posing as ice cream (and doing a dang good job at it)! Bakerella is a genius, she’s the one who originally dreamed these up. Then I just took it a step further and added a cake bite ice cream bowl!
Best part EVER - no melting ice cream.
Just CANDIQUIK, taking cake balls for a quick dip, drip, and dry!
Warning: this post is going to have a lot of pictures! I took a lot. I am so indecisive.
HERE’S THE SCOOP (pun intended!) these are MINI.
You must give your ice cream cones a trimming. 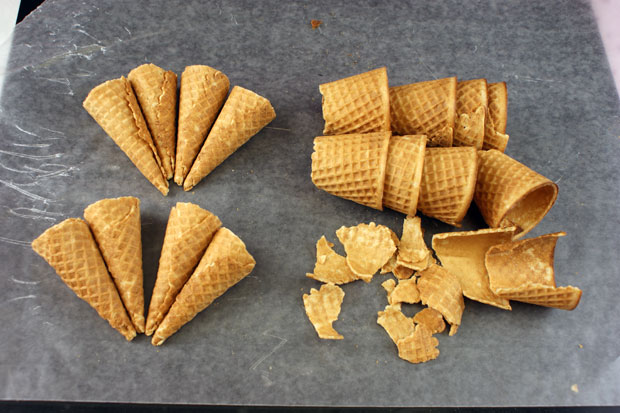
- 1 box cake mix (plus ingredients for cake mix)
- ½ cup cake frosting (canned or homemade)
- 40 waffle ice cream cones
- 2 packages (16 oz) Vanilla CANDIQUIK® Coating
- 8 oz. Chocolate CANDIQUIK® Coating
- 1 bag M&M’s® (or red candies)
- Assorted sprinkles
- Prepare and bake cake mix as directed on box; cool completely.
- Crumble cake into a large bowl. Add frosting and mix thoroughly.
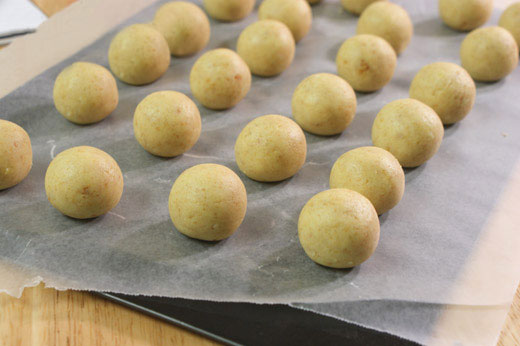
- Roll mixture into 1″ sized balls. Chill for approximately 1-2 hours in the refrigerator.
- Carefully cut the top of the waffle cones off, so the cones measure approximately 2 ½ inches tall.
- Melt Vanilla CANDIQUIK in tray according to directions on package.
- Press a cake ball on top of the mini waffle cone. Dip the top of the cake ball into the CANDIQUIK by holding the end of the cone. Slowly allow most of the excess vanilla coating to drip off, letting a little melt down over the cone (gives it the melted look
- when dry)! Sprinkle if desired.
- Stick cones into a Styrofoam block or ice cream cone holder to dry. Once dry, melt Chocolate CANDIQUIK and spoon a small amount on top of each cone allowing it to drip over the sides. Top with a red M&M candy before chocolate has set.
Cake Bite Ice Cream Bowl
Prep time: 2 hours 30 min
Cook time: 30 min
Total: 3 hours
Yields 8 waffle bowls (approx. 40 cake balls)
Ingredients:
- 1 box Cake Mix (plus ingredients for cake mix)
- 1/2 of a (16 oz) container vanilla frosting
- 1/2 package (8oz) Chocolate CANDIQUIK Candy Coating
- 2 packages (16 oz) Vanilla CANDIQUIK Candy Coating
- 8 waffle ice cream bowls
- 1 bag M&M’s (or red candies as cherries)
- Assorted sprinkles
Instructions:
- Prepare and bake cake mix as directed on box; cool completely.
- Crumble cake into a large bowl. Add frosting and mix thoroughly.
- Roll mixture into 1″ sized balls. Chill for approximately 1-2 hours in the refrigerator.
- Melt Chocolate CANDIQUIK in tray according to directions on package. Dip rim of waffle ice cream bowls in melted Chocolate CandiQuik; set on wax paper to dry. Set Chocolate CANDIQUIK aside.
- Melt Vanilla CANDIQUIK coating in tray according to directions on package.
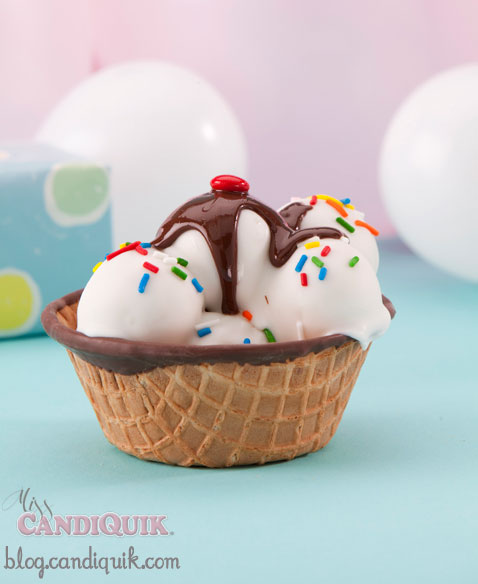
- Dip cake balls in melted CANDIQUIK, and place inside waffle ice cream bowl. Place 5 coated cake balls in each ice cream bowl. Sprinkle if desired.
- Once dry, reheat Chocolate CANDIQUIK and spoon a small amount on top of each pile of cake bites, allowing the chocolate to drip. Top with a red M&M before coating has set.
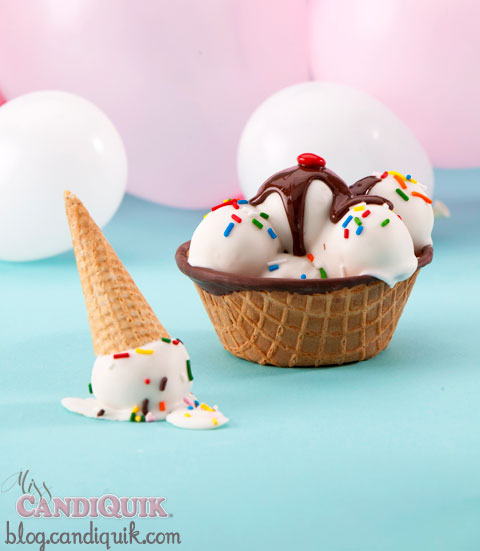
OOPS! Ok - not really. But I looove this one - dip a cake ball (the messier the better), plop ‘em on wax paper, sprinkle, and press the cone on top!
You can always use sugar cones and saw the tops off using a knife. Or you can make it easier and buy the mini kid cones (I’ve only seen these in select stores and they are the ‘Joy’ brand).
I really want to keep going and showing you the 150+ different pictures of these ice cream cones, but I’ll save that time for you to get started on these ![]() As always, thanks for reading!
As always, thanks for reading!
P.S. if you want to make 220 of these things (I do!) then you can buy actual mini ice cream cones in bulk online here!
P.P.S. Click here for my cake pop tutorial!
Want more ice cream? Check out all these fun ideas from fellow bloggers!






Seriously…how do you come up with these adorable ideas? I haven’t seen one thing that hasn’t made me hungry
I think my daughter would love to make the ice cream cone cake balls…I’m going to put those on our “to do” list.
Thanks Kayla! I know your daughter will love these! Happy baking
Oh my, oh my I WANT these! They are so cute!!!
Stunning!
Love those little cones and how real they look – great job!
Ohhh how I love these!
So so cute, look so refreshing haha…
Very awesome blogpost, indeed, so happy we all did this again!
Many blessings,
niner <3
Thanks so much!
the ice cream in the waffle bowl is my favorite! :>D
Hi Lisa, the waffle bowl is definitely my fav, too!
Disculpen, pero por la traducción al castellano , no entiendo con que se mezcla la torta desmigada para realizar las bolitas??? gracias
Hi Viviana, si – the crumbled cake is mixed with the frosting and then rolled into balls. I hope this helps. Thank you!