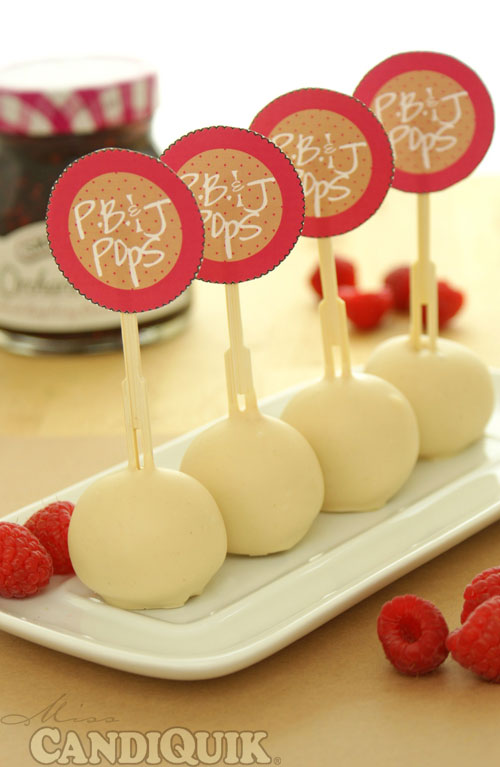
Can I tell you the truth about my relationship with peanut butter!? I love peanut butter on apples. However, I’m not the biggest fan of peanut butter cookies (I know, I’m crazy). Plus, I’m totally picky about the brand of peanut butter I use - if it’s with apples, has to be Mara Natha. But please, if you make these, use Skippy. It’s just sooo peanut-buttery and has a strong enough punch of flavor for this cake, am I making sense?! Also, use jam or preserves (please), not jelly preferably.
I have had this vision of peanut butter cake bites filled with raspberry jam for quite some time. I finally fulfilled my vision and it exceeded my expectations, by far!
It is not only a great back to school treat for the kiddos, but I could scarf down more than my share of these.
I will forewarn you though: the aroma of this creamy, peanut buttery goodness seeping out of your kitchen will have you picking at this cake before it is in cake pop form. For your own sanity, you may as well cut a fresh piece to nibble on while transforming the rest into pops. The cake tastes similar to a peanut butter cookie, but 10x better in my opinion. It is a dense, smooth, moist and creamy cake that melts in your mouth.
This peanut butter recipe (originally for cupcakes) was a version created by Martha Stewart. I used the {slightly} adapted version by Brown Eyed Baker and then I ever so slightly adapted it, again. My secret ingredient? Greek yogurt. I was just being health conscious, substituting naughty stuff for good stuff.
- (for cake)
- 1¾ cups all-purpose flour
- ¼ teaspoon baking soda
- ¾ teaspoon baking powder
- ¾ cup salted butter, softened
- 1⅓ cups granulated sugar
- ⅔ cup creamy peanut butter (I used Skippy)
- 3 eggs
- ½ teaspoon vanilla extract
- ½ cup plain greek yogurt
- 8 oz. cream cheese cake frosting
- bamboo fork toothpicks (or any wide toothpick/lollipop stick)
- wooden dowel (to create indent for adding jam)
- (coating)
- 2 (16 oz) packages Vanilla CANDIQUIK Coating
- 3 tablespoons creamy peanut butter
- (filling)
- raspberry jam or preserves (or your choice of flavor)
- Preheat oven to 350 degrees F.
- Whisk together the flour, baking soda, baking powder, and salt; set aside.
- With an electric mixer, cream the butter, sugar and peanut butter together until pale and fluffy. Add the eggs, one at a time, beating until each is well incorporated. Reduce speed to low and mix in greek yogurt and vanilla extract.
- Gradually add the flour mixture; beat until just combined.
- Pour batter into a greased 13x9" pan.
- Bake approximately 28 minutes or until the center comes out clean and edges are golden brown. Let cool.
- Once cool, crumble cake into a large bowl. Add frosting and mix thoroughly.
- Roll mixture into 1” balls and place in the refrigerator until firm (approximately 30 minutes).
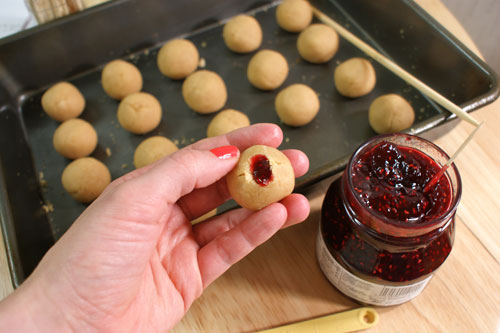
- Remove mixture and use a wooden dowel to create a deep hole in the center of each cake ball; reserving 5 cake balls. Using a toothpick or small measuring spoon, spoon a small amount of jam into each hole.
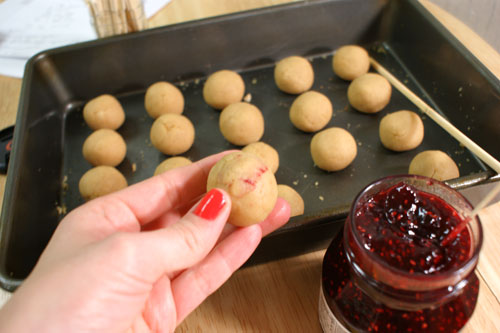
- Using the reserved cake balls, pinch a small amount off and use your fingers to smooth it over and seal the hole that is filled with jam. Place the jam-filled cake balls in the freezer for 15 minutes.
- Melt CANDIQUIK in tray according to package directions. Once melted, stir in 1½ tablespoons of peanut butter into each package of coating. Transfer the CANDIQUIK into a deep bowl.
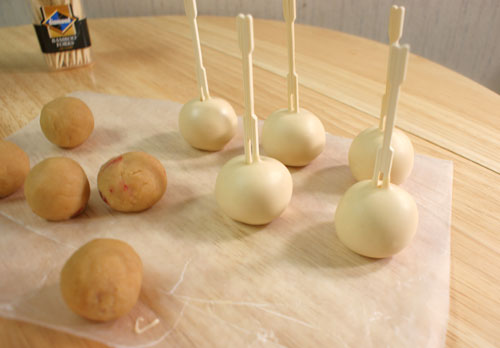
- Remove cake balls from freezer and dip the tip of the bamboo toothpick into the CANDIQUIK® and insert about ⅓ of the way into the cake ball. Dip cake pop immediately in the CANDIQUIK, removing promptly. Allow excess coating to
- drip off and set on wax paper to dry completely.
*With any cake pops, be careful not to store in the freezer too long - otherwise they may crack after you dip them in the candy coating.
*When dipping cake pops, remove only a few at a time and keep the remaining cake balls chilled.
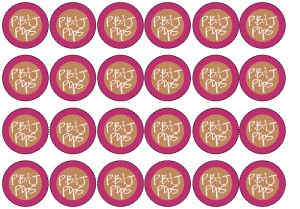
Oh, you probably want that printable cake pop tag, too?! Click and print the jpeg image below or save the pdf.
Simply print on cardstock, cut out and you’re ready to go!
Printable PB&J Cake Pop Tags PDF
Happy Baking!
*Featured on: Crazy for Crust, DJ’s Sugar Shack


These are just brilliant!
Hi Janine, thank you & thanks for stopping by!
These look amazing!!
I’ve never thought of making a jelly filling in a cake pop. I’ve mixed it in as the binder. Something new to try! Thank you!
What a great idea!! And I just so happen to have left over peanut butter cupcakes at home right now! I guess I know what I’ll be doing with them!! I’d love it if you’d share these at Sweet & Simple Sunday!!
http://cupsbykim.blogspot.com/2012/06/sweet-simple-sunday-nine.html
Hi Kim – left over pb cupcakes…it was definitely meant to be. Thanks for stopping by
These are so cute. I love the printable too. Thanks for sharing on Whatcha’ Whipped Up! Hope to see yo there again this week!
I just wanted to let you know that these are being featured at Whatcha’ Whipped Up! Hope to see you there again this week.
Dawn DJ’s Sugar Shack
Yay! Thanks Dawn! I will be linking up this week.
Please tell me where you found the bamboo toothpicks?
Hi Julie –
I bought those at Target! Hope you find them (I replied to your email as well). Thanks! -Sarah
Hi! I’ve been reading your site for a long time now and finally got the courage to go ahead and give you a shout out from New Caney Texas!
Just wanted to tell you keep up the great work!
thanks for stopping by