Sometimes I have a hard time focusing on one thing for a long period of time.
I’ll be writing a blog post and go to check who commented on my last status update, then I remember an email I need to respond to, then I just need to check the weather… you know how it goes…
I’ll be in the middle of baking cookies and think to myself, “I should really bleach my whites…”
I’ll check the yahoo home page to find out that Ryan Gosling saved a woman’s life, then I begin to think of Kristan’s “Hey girl…” photos.
And don’t even get me started on Pinterest… it inspires and stresses me out at the same time.
Please tell me this is somewhat normal. Or maybe I have ADD. For real.
But sometimes this can be a good thing. Like when you buy these…
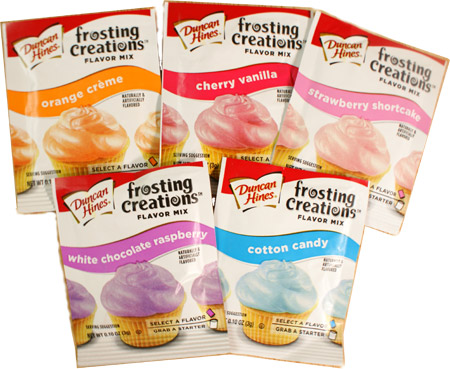
and end up with this…

True story! Try it.
Mmm, cherry vanilla.
If you can’t find these Frosting Creations, you can always use oil-based candy coloring or flavors in your CandiQuik. Anything else water or alcohol-based will result in clumpy, globby CandiQuik and that’s like the saddest thing ever after those ASPCA commercials. Darn you, Sarah McLachlan!
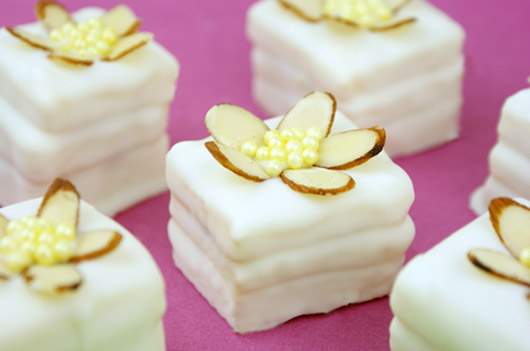
Now, how about those petit fours pictured way up there!?
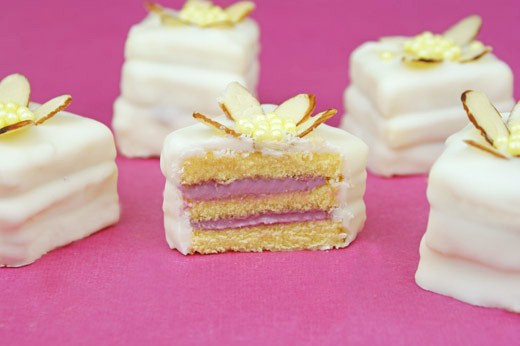
What is a petit four anyways?! A tiny cake. A tiny, multi-layered cake enrobed in a vanilla coating (in this case). YUM!
The best part about using the candy coating (versus say…white chocolate or fondant) is you can pick up these little cuties. Finger Food. No messy, sticky chocolate that never fully sets or dealing with fondant – I mean fondant looks nice and all, but that’s about where the compliments stop.
These are the easiest petit fours you will make!
Easy Petit Fours
yield: 12 petit four mini-cakes
-
1 package Vanilla CandiQuik
-
1 prepared pound cake (16 oz size - I used Sara Lee!)
-
4 Tbsp frosting (I used Duncan Hines Frosting Creations in White Chocolate Raspberry)
Directions:
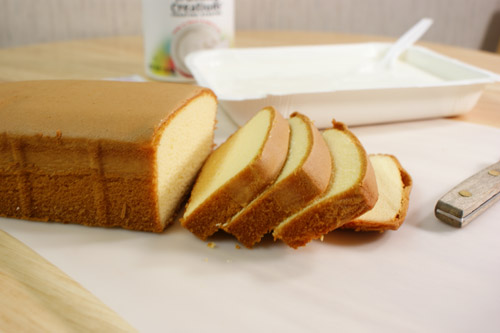
1. Cut your pound cake into even slices, about 1/4 inch thick. Trim off the brown edges.
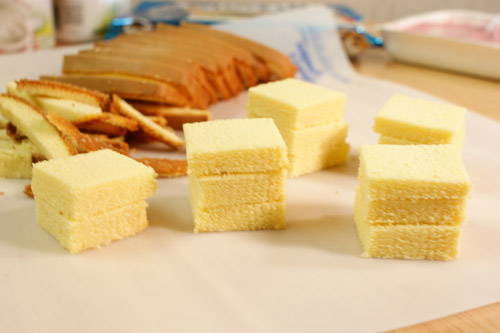
2. Cut 1″ squares out of the pound cake using a knife or small cookie cutter. Each mini cake will have 3 layers.
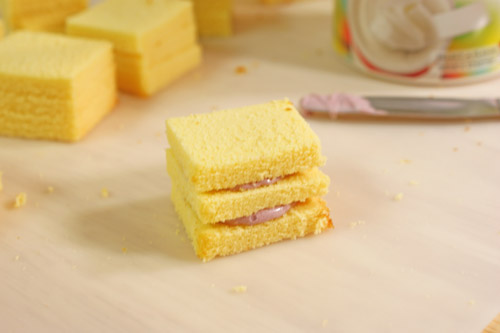
3. Spread a small amount of frosting between the two bottom layers and gently press down to compress.
4. Melt CandiQuik according to package directions (this is where you could add the Duncan Hines Frosting Creations powder if desired!).
5. Coat the mini cakes completely in the candy coating. The best method to coat these is to place the mini cake on your fork, carefully lower into the CandiQuik and use a wide spoon to pour the coating over the cake.
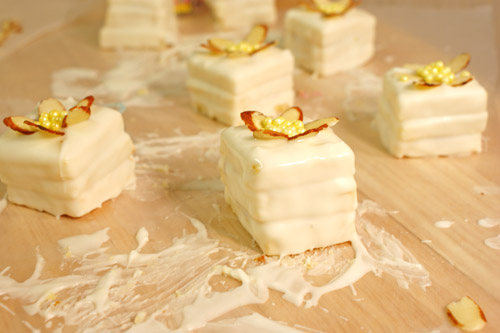
6. Slide onto wax paper to dry. (Use both utensils to remove from the fork so you don’t tip your cake over!) Decorate. Voila!


What a great idea! And these are beautiful! I’d like to invite you to Sweet & Simple Sunday!!
http://cupsbykim.blogspot.com/2012/03/sweet-simple-sunday-3.html
Hope you can stop by and link up!
What a great way to use those packets! I must get me some. I keep forgetting to buy them. These treats are super gorgeous. Love them!
I keep looking at those packets but I haven’t gotten any yet!!! I love elegant these little cakes look. My favorite though is the center of pearl sprinkles in the centers:-)
These look awesome!! How do you take them off the fork without getting finger marks all over your cake?
Hi Diana, I actually don’t even touch them, I simply use two utensils to remove them (the fork I use to dip them on and then a spoon/knife to help “scoot” or push them onto the wax paper. Hope this helps!
i didnt know you could mix the DH flavor packets with candiquik???????? for real???
Isn’t that cool! They are powder-based, so I couldn’t see why they wouldn’t work…and I was right!
Must the cake be kept in the fridge till serving time?
Can they be prepared a day ahead?
Hi Evelyn,
There is really no need to store in the fridge (unless using a perishable frosting). And yes, they can be prepared a day (or two) ahead of time (the coating seals everything in and your cake will stay nice and moist)!
I have GOT to try petit fours! Pray for me!
Yes, you should. You will dominate them! Thanks for stopping by. -Sarah
Love this idea! I am going to make them for a baby shower next week! one question… how many does one pound/ one package of candiquick yield? I need about 40 and don’t want to make multiple trips to the store for more items… thanks!!!
Hi Cari – I was able to make 12 petit fours out of 1 pound cake and 1 package of CandiQuik.. So to be safe, if you need 40+ I would get 4 pound cakes (then you have a little room for error, too) and 4 packages of CandiQuik. You may have a little CandiQuik leftover, but just let it harden and store in an airtight container in the cupboard until you are ready to melt it again – it has a long shelf life and can be reheated many times! Hope this helps, Sarah
Love this!! I’m going to make them for a birthday party. Any thoughts on making them in advance & freezing them? Xoxo
Hi Nicole, I’ve never personally froze them, but I know they would be good if you made them a few days in advance and stored them in an airtight container. Good luck!
Thanks so much! Can’t wait to try them! Xoxo
Love this idea! Wish I had found it two months ago when I made petit fours for the first time–100 of them!!!
Thanks, Peggy! Wow…that’s a lot of petit fours!
So do you have to buy 2 packets of the frosting creation because you add some to the frosting then add it to the candi quik also… Trying to make my shopping list to give these a try
Hi Heather, you only need 1 packet – I did not add any of the frosting creations to the candiquik, although you could! Also, you can use any cake frosting you want, just depends on the flavor you’d prefer! Thank you
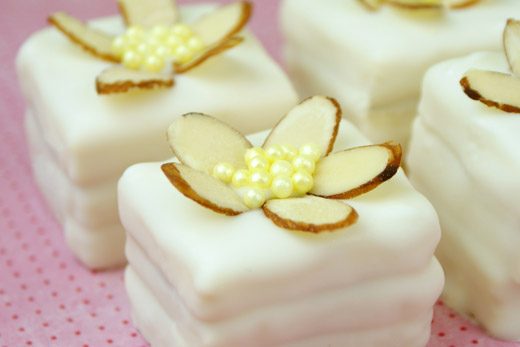
I shared a pic of this on a “tea party” my friends and I were having on FB and we all want to know what you have in the center of these petit fours? We recognize of course the almond slices.
Hi Angie! The middle of the flower is made up of sugar pearls, basically just large sprinkles. You can usually find them in the baking aisle. I hope this helps! Thanks for reading!
This is a quick and easy way to create a wonderful and eye catching dessert. I have a few suggestions that you might like to try, that would make creating these tasty morsels a bit easier. Start by cutting and filling the pound cake first and then freeze for a half hour or so. This will make it much easier to cut into 1″ sq. and the petit four will be completely assembled in one easy step. Place a tooth pick through all the layers of each little cake. This will help in keeping the layers together when you dip them in the chocolate. This process will give you a smoother looking petit four when they are dipped and illuminate seeing the layers that you are getting now when you assemble them individually. Also, putting the petit fours back in the freezer for 10-15 minutes before dipping them will help in keeping them together and the coating will harden quicker. Using a cooling rake covered in wax paper, you can pierce through the paper with the tooth pick and slide the petit four off the tooth pick onto the rake to dry completely. These steps should give you a professional looking petit four. Thanks for sharing your petit four recipe with us.
Thanks for the tips, Christine! I’ll certainly try that the next time I make these!