A few things I’m loving right now:
- My new Kitchen Aid mixer that I got for $130 off!
- Meyer Lemons – if you haven’t, you need to.
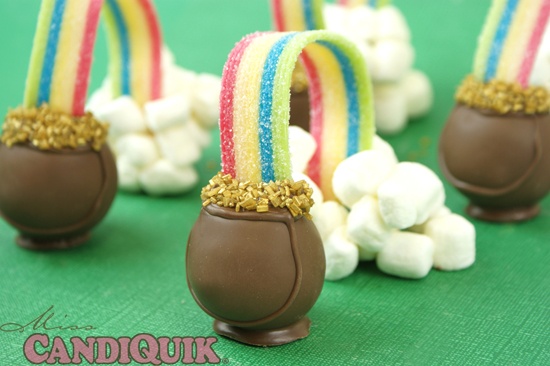
- These cake bites!
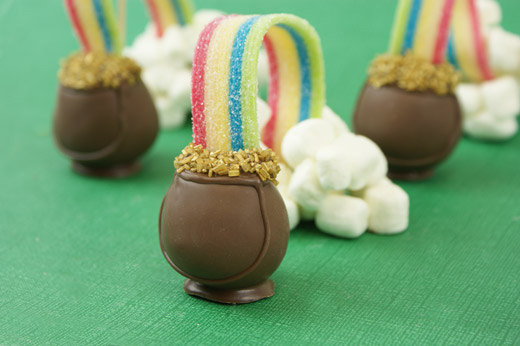
I’ve been so excited to show you these… I have been waiting since January to use these little sour candy things (aka rainbows) I found at Target in the dollar section. Now it’s March something and I’m rushing to publish them to the world wide web. What the heck happened to February – and when did March get here?! Sorry, I’ve been locked in a room rolling 2000 cake balls for the past week ![]()
These are a bit time consuming to make, but I’ve saved you the trial and error of figuring out what works best.
Here’s what my research has found: Begin by making basic chocolate coated cake pops, the only difference is the shape of the ball; I slightly flattened the top of mine as you will see in the photos below. If you’ve never made cake pops - start here.
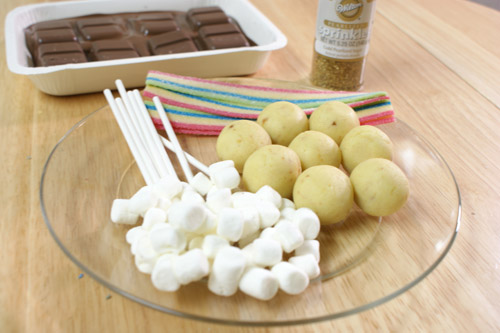
Supplies you will need:
-
1 box cake mix (+ ingredients required)
-
8 oz of cake frosting
-
2 lbs Chocolate CandiQuik Coating
-
Air Heads Xtremes Sour Candy
-
gold sprinkles
-
1 bag mini marshmallows
-
lollipop sticks
-
styrofoam block (to set cake pops in while drying)
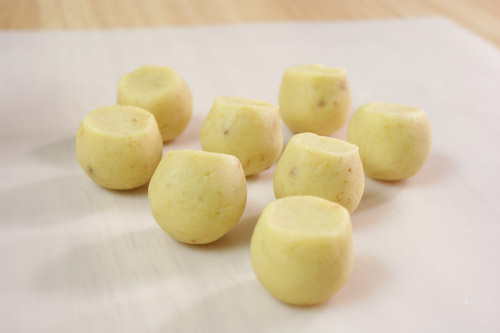
2. Pipe on the handle and rim of the pot using a piping bag or a plastic ziploc bag with one tiny corner snipped off (freezer bags work best because they will withstand the heat of the coating and you can zap them again for a few seconds if needed).

3. Un-Pop your cake pop. Haha, in other words: *carefully* remove the lollipop stick from your cake ball by twisting and gently pulling. You may be asking yourself, “What was the point of putting it on the stick!?” Well, here’s why: you will get much cleaner bases and a more accented curve for the pot doing it this way. Not to mention, piping is easier when you have a lollipop stick to hold onto.
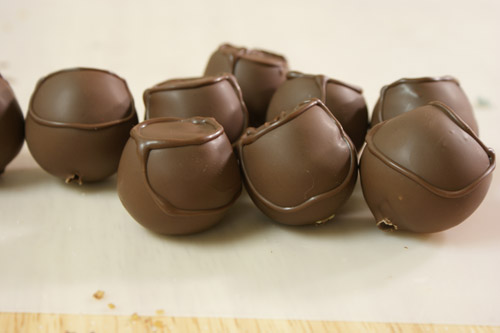
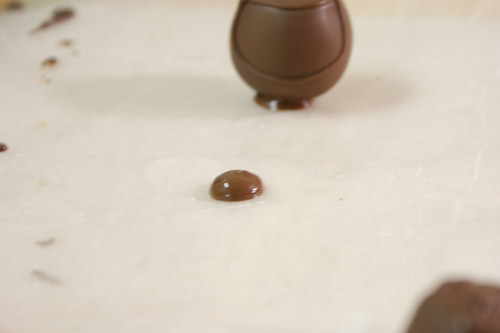
4. Pipe a dot of chocolate CandiQuik onto wax paper – place your cake ball on top, this will form the base of your pot o’ gold and help the cake ball stand up straight.
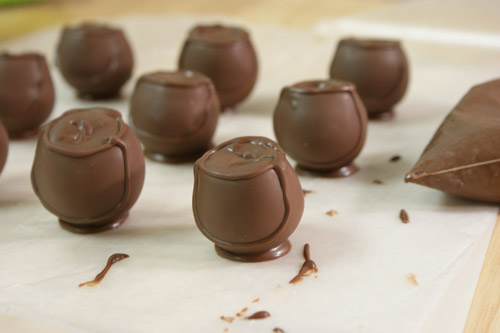
5. Cut your rainbows into ~4″ strips. Pipe a line of chocolate on top of your cake ball and hold one end of the rainbow in the coating until set. Then poke a small hole with a toothpick directly behind the rainbow (the rainbow candy is very limp and will need assistance to stand up).
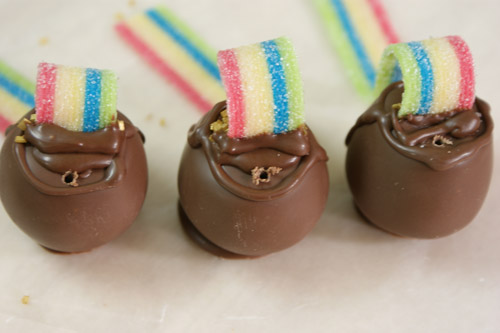
6. Fill in the top of the cake ball by piping more chocolate CandiQuik; quickly cover with gold sprinkles. Insert the toothpick into the hole you made (just don’t press it down too far, because it could crack your cake ball).
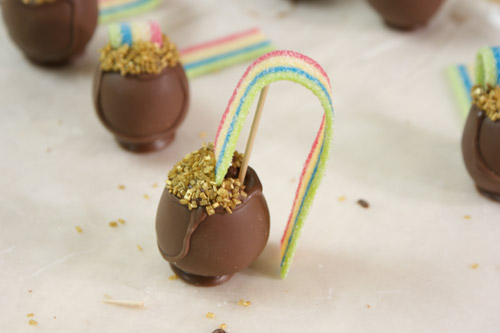
7. Grab a small handful of mini marshmallows and press together with your hands.
8. Use a dab of CandiQuik to “glue” the opposite end of the rainbow candy in the middle of the marshmallow “clouds”.
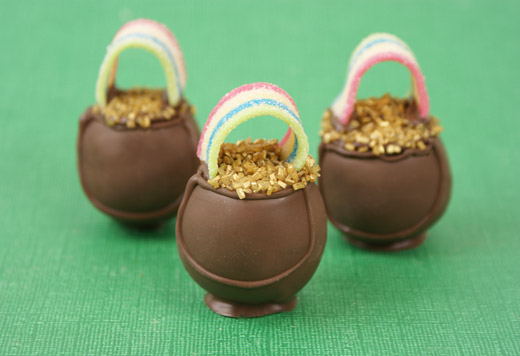
And if you’re still reading and thinking there’s no way you’ll make these…try these as a cute, simplified alternative:
Related Posts
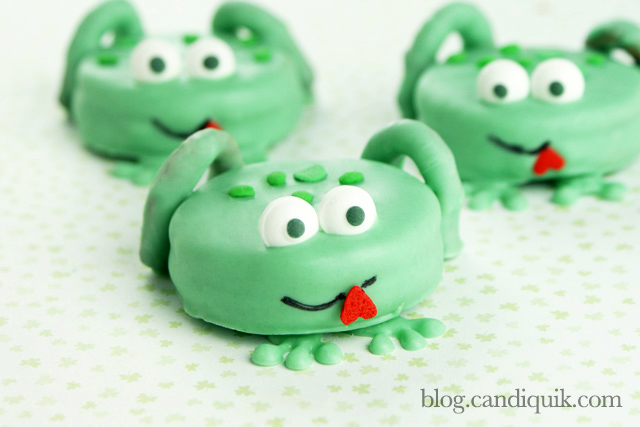
Frog Cookies
These cake bites are also linked at the following parties: Mrs. Fox’s Sweets, BruCrew Life, Crazy for Crust, Kurtz Corner, Sweetology, Something Swanky, Kitchen Fun, Dwell on Joy, Luck of the Irish Party, Cake Apothecary, Bacon Time


This is one of the cutest treats I’ve ever seen! My son has snack day this month and I’m making these…thanks for the the great tutorial too!
Aww – Thanks, Lisa!
Those are beyond awesome. So flippin’ cute. I am also bummed about the new facebook pages. I can’t ever find what I’m looking for!
CUTE!!! Just posted our Kitchen Fun and Crafty Friday link party…would LOVE for you to share this! http://kitchenfunwithmy3sons.blogspot.com/2012/03/kitchen-fun-and-crafty-friday-link_08.html
Thanks, Jill! On my way over to share them on your blog :). Thanks for stopping by!
Wow!! Really NICE job! These are super adorable! ;-}
Thank you, thank you! I think they are even “an original”. So many times when you make something, you see the same thing/very similar thing if you look it up on google – have seen plenty of “pots of gold” but none with the rainbow and clouds! Thanks for stopping by!
Oh my word…those are the cutest cake balls ever!!!! Totally pinning this!!!
These are SO cute! Love them! Both versions are great!
Thanks, Andrea! Now I know that people DO read all the way to the end of the post Happy Friday!
Wow! These are adorable! They look so professional and both versions are totally beautiful!
You’re so creative!!!
-Carly @ Createlive
Thank you for the kind words
These are adorable! What a great idea…had to stop by and check them out:)
Besides my weekly Anything Goes fri-monday linky I am hosting a St. Patties linky this week. Please come share these. They are the cutest thing I have seen in a long time.
These are way too creative and beautiful for words! I LOVE the ones with the clouds but I have to say, the simple pot of golds are my favorite. This is so excellent; I’m pinning ASAP!
Thanks so much, Hayley!
I’ve seen lots of pot of gold cake balls/pops, but none as nice and clever as these. Great job.
These are amazing! Great job!
I LOVE these! Sooo cute! I found you on Mrs. Fox Sweet and put you in my St. Patrick’s day Roundup! Check it out
http://www.pandpkitchen.com/2012/03/17/st-patricks-day-roundup/
Awesome! Thanks so much!
This is such a clever and cute idea. I love it and I’m sure the kids will love it too.
These are fantastic! The time and effort you put in really shows!
thank you, thank you!
So VERY creative! I love it…pinning it! =)
Thank you so much, Lillian!
I absolutely adore these! Thanks for breaking it down and sharing!
Hi,
Just wanted to let you know I am sharing your wonderful post tomorrow in my 100 Something Green St. Patricks Day RoundUp http://wp.me/p466oG-11f with a link back to your original post plus pinned to my St. Patricks Day Board! Have a terrific weekend!
Cathy from APeekIntoMyParadise.com
Hi Cathy,
thanks so much for sharing! Heading over to check out your roundup now!
These are truly adorable!! Love them!
Sarah,
These are beyond cute, and your tutorial is just perfect! I would be thrilled if you would link them to my “Get Your Blarney On”
link party! It’s all about celebrating St. Patrick’s Day! http://bit.ly/1luIm3M
Hope to see you there!
What a clever idea! Those look so cute and I bet are quite tasty too. Thanks for sharing a tutorial on how to make them.
Very cute idea! I hope that you don’t mind that we share your idea with all our fans on our site at http://www.custompartytime.com.
Thanks!