
Have you made cake pops and they were a complete disaster? Yeah, me too.
Seriously. We’ve all burned the heck out of our chocolate, lost a cake ball off the stick, had our beautiful cake pops crack 5 minutes later, or had them leak weird stuff everywhere! It’s sooo frustrating!
Don’t worry though, it gets better! But let me save you some time and sugar with a few tips. Cool?
I look back on my first cake pops (if I’m even allowed to call them that) and they are sad. See the picture at the end of this blog as proof. Let’s just say, practice makes perfect and now I’m obsessed with cake pops. I think they are the best thing since sliced bread. Dang Bakerella, look what she started. Just kidding, I love her.
If you need a laugh, just check out these girls experience when making cake balls for the first time.
Common Issues & Problems with Cake Pops:
Why are they FALLING OFF THE STICK?
This can happen for a couple different reasons. I think the most common is thick coating and it is dragging your cake pop down. Smooth coating is one of the most (if not 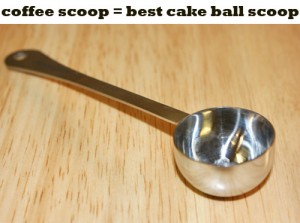 THE most) important parts of successful cake pops!
Additionally, huge cake balls = heavy cake balls. So try to make them moderate size (1″) and use a spoon (small cookie dough scoop, coffee scoop, melon baller) or something to measure an even amount for each ball. I bought an awesome coffee scoop at Target for $5 and it gives me perfectly sized and consistent cake balls every time.
When I first started making cake balls I would use the whole container (16 oz) of frosting. Now, I start with adding 1/3 of the can and typically use up to 1/2 cup (8 oz) of frosting. You could probably get away with even less than that, but I found this amount is good for me and rolls out smooth. Cake balls that are too gooey won’t stay put!
Also, when dipping your cake pops, dip the stick in the coating first and insert into the cake ball. Then, when dipping the cake pop make sure that you don’t bump the bottom of the cake ball on the bowl/cup. Finally, don’t swirl the cake pop around in the coating, just dip and get out!
My cake balls and pops are NOT SMOOTH!


This is probably the easiest problem to fix and it begins with baking your cake. Do not overbake. Simple enough! Second, trim off the edges and (if you’re obsessed like I am) leave out the bottom of the cake, too. Mix thoroughly with frosting. Thoroughly, as in: dig in using your clean hands to mush the cake and frosting together. Finally, roll, roll, roll. The smoother they look as uncoated cake balls, the better they will look when dipped. Voila.
Dang CRACKS!

They look perfectly fine, then magically they look like they experienced an earthquake. Super frustrating! Typically, this is caused by the difference in temperature of the coating and the cake ball itself – the coating is hot and the cake balls are too cold, the cake ball expands, and now you have cracks. While I do like to chill my cake pops in the fridge (sometimes freezer for a few minutes, but be careful – there is a fine line between keeping them firm enough to stay on the stick and too cold where they crack), make sure you pull them out before dipping and that your candy coating isn’t TOO hot (let it sit for a couple of minutes after heating).
Cracks are the biggest challenge I have found with other cake poppers, too, and sometimes – even with the perfect conditions – cracks happen.
My Cake Pops are LEAKING CAKE/OIL!

Some call it cake pop *poop*, which I think is a good word for it. After all, this was my initial reaction for it when I began making cake pops a couple years ago. This happens when the cake is pushing it’s way out of the coating through a weak spot, a tiny hole, or a bubble that resulted in a hole. Make sure you coat the entire cake ball in coating. This issue can also be caused by the cake ball and coating temperature difference – see the “cracks” problem. But in my opinion, leakage is better than cracks, so if you have a leak – pull the excess cake off and cover the hole with a little bit of additional coating.
The cake can also be very oily, causing oil to seep out the coating and even down the lollipop stick. If this happens, remember, you can always substitute apple sauce or greek yogurt for oil in your cake recipe!
Using less frosting = less oil. Again, you can seal any holes up with a little candy coating, but despite all of that, I still have some cake pops that are oily and the stick literally absorbs the oil and I’m fine with that, as long as they don’t crack and leak! Colored lollipop sticks would help hide any oil absorbed (these can be purchased online or at specialty cake supply stores).
What are these AIR BUBBLES?!

Air bubbles happen, but you can prevent them. These are usually caused by stirring your chocolate too vigorously. To prevent air bubbles, create a smooth “spot” with the back of your spoon before dipping your cake pop. It helps drastically! Just run your spoon (in a back and forth motion) over the coating between dipping each cake pop. If you notice the air bubble upon pulling your cake pop out of the coating, just give it a second dip immediately.
My coating is THICK & CLUMPY!


You may have scorched your coating. This is a very common issue and happens when the sugar particles become too hot, causing them to caramelize or scorch. When using the microwave, be sure to follow the instructions on the package and heat the entire block of CandiQuik for an initial 60 seconds, then stir very well and heat in 15-second intervals. If using less, adjust the microwave times accordingly. Remember, you can’t go back in time if you scorch your coating, so it’s better to start off slow. Of course, microwaves can heat unevenly and cause hot spots, so using short intervals and stirring between each one will help this. If your microwave has a turntable, try placing the CandiQuik tray away from the center, this way all parts of the tray are moving at all times and help even out any uneven heating. If melting on the stove top, make sure you have the burner on low heat and stir constantly.
And of course, I suggest using CandiQuik Candy Coatings. I don’t have to add anything to thin it out and I get a nice, smooth, palatable, thin shell of coating (versus a thick, gloppy mouth full of thick sugar particles).
If you notice the coating is thicker than normal (commonly caused by humidity/climate), add a teaspoon-tablespoon of solid vegetable shortening (ex: Crisco) to the melted (16 oz) coating. Begin by adding a little and add more if needed.
*If just a tiny section has burned, scorched, or became too hot, I have been able to save the rest of the coating by carefully scooping out all of the coating that was burned! Simply spoon it out and allow the rest of the coating to cool slightly, then continue heating in short time intervals. This is usually a microwave heating the coating unevenly.
My Coating is DRYING TOO FAST!
This is usually caused by overheating. See the tip above on thick and clumpy coating. However, whenever I have added oil-based or powdered food colorings (the only kind to use with candy coatings), it simply dries faster. I cannot explain this, but it just means you have to work faster! It can be good in the case that you don’t have to wait so long when tapping the excess coating off, but it can be hard when making character pops. Also, whenever adding a lot of coloring to your CandiQuik, I add a little Crisco to the coating as well; some brands of the oil based food colors cause it to become slightly thicker than normal.
*I recommend oil-based versus powdered food colors if you have the option. I have had issues with the powders leaving little specks in the coating.
Once you get the basic recipe down, check out my other recipes for cake balls, pops, and bites!
- 1 box cake mix (plus ingredients for cake mix)
- ½ cup frosting (canned or homemade is fine)
- 2 (16 oz.) packages Chocolate and/or Vanilla CANDIQUIK Coating
- Lollipop sticks
- Styrofoam block (to set cake pops in while drying - may be found at any craft store)
- Optional: sprinkles and/or food coloring (oil or powder based only. Found at your local craft or specialty baking store)
- Prepare and bake cake mix as directed on box. Allow to cool slightly, at least 30 minutes (longer if not in a hurry).
- Crumble trimmed* cake into a large bowl. Add frosting and mix thoroughly with hands. (*see notes)
- Chill mixture approximately 2 hours in the refrigerator.
- Measure cake mixture and roll into 1” sized balls. Place on a wax paper lined baking sheet. You may need to place the cake balls back in the fridge for 20-30 minutes, allowing them to firm up.
- Insert a lollipop stick into each cake ball. You can dip the lollipop stick in a small amount of coating before inserting into the cake ball if you have had issues with it falling off the stick. *Tip: remove a few cake pops at a time to dip, storing the others in the fridge until ready.
- Melt CANDIQUIK according to directions on package, being careful not to overheat. If desired, add oil or powder based food coloring; stir until blended. To Dip: you can use the tray that the coating comes packaged in, or a deep microwaveable bowl or a mug/cup works great.
- Dip cake pops in melted CANDIQUIK; allow excess coating to drip off (hold at a ~30 degree angle allowing the coating to drip off the bottom and not drip on the stick) by tapping the stick and place in the Styrofoam block to set.
- Decorate cake pops as desired with candy coating and/or icing and sprinkles.


Ok, this next picture is slightly embarrassing…

Well, they didn’t have cracks (yet) and they are still on the stick, right?!?!
CandiQuik Melting Instructions:
- Microwave: Melt CANDIQUIK® Candy Coating in Melt & Make™ Microwave Tray for 1 minute. Stir well. Note: Product retains shape until stirred. If not completely melted, continue to microwave for 15 second intervals, stirring after each interval until smooth. If melting less than entire package, reduce microwave time accordingly.
- Oven: Preheat oven to 250°F, TURN OVEN OFF. Place CANDIQUIK® Candy Coating in Melt & Make™ Microwave Tray in oven for 10-12 minutes. Remove tray from oven and stir until smooth.
- Sauce Pan: Break CANDIQUIK into squares. Place in heavy sauce pan. Melt over LOW heat about 10 minutes, stirring often until smooth.
Tips & Tricks:
- ALWAYS use dry utensils. Moisture will cause the product to become hard or lumpy.
- STORE unopened packaging in a cool, dry place (55°-70°F). If opened, store in an air-tight container.
- REHEAT and reuse CANDIQUIK multiple times! Just store in an airtight container/plastic bag between uses.
- DO NOT overheat. Overheating will cause the product to scorch or caramelize.
- DO NOT add water, milk, oil, margarine or butter to Candy Coating.
- DO NOT use water-based colorings or flavorings.
- CANDIQUIK may be colored or flavored using oil-based or powdered colorings or flavorings.
FAQ’s
Q: What brand of food coloring do you use?
-
I typically use a commercial brand called Colorcon Opatint. I would also recommend oil-based (versus powdered) food colorings. These can be found in the specialty baking aisle at craft stores such as Joann or Michael’s.
Q: Do I have to refrigerate my finished cake balls/pops?
-
Refrigeration is not typically required for cake balls (unless you are using a perishable frosting). Refrigerating your cake balls/pops can cause condensation on the coating and this moisture will cause the coating to become sticky. Store them in a cool, dry place and they should be fine!
Q: How long will my cake balls/pop stay fresh?
-
The candy coating shell acts as a sealant and keeps the cake surprisingly fresh! I have kept mine for just over a week and they still tasted great! Just be sure to store in a cool, dry place.
Q: Can I make my cake balls ahead of time and freeze them until ready to dip?
-
Absolutely. Just be sure to freeze them in an airtight container. Also, when you pull them out to defrost be sure there is no condensation on the cake; if there is, simply dab off with a paper towel.
Great cake pop tips and tutorials from other bloggers:
Love From the Oven- helpful information on using the right coating!


Thank you, these are great tips! I use a Wilton chocolate melter with my Candiquik, and it works great. I do have to use a teaspoon of Crisco to get the Candiquik to flow just right, but Missouri can be pretty humid.
Thanks Holly! Glad to hear….and yes, I’ve found that even when it’s humid here in Minnesota or when I travel to humid climates that the CandiQuik behaves slightly different – kinda funny how that works. Thanks for the comment!
HI! I dont ever seem to have a problem with the cake balls being to big, or “pooping” or even falling off the stick here in Florida. My chocolate is always melted nicely and smooth, thank goodness. But my problems lies after the chocolate is on the ball/pop…. how come the chocolate doesnt appear smooth and pretty like yours? It seems like the chocolate just falls off the ball. If I set the ball/pop down to dry, then the chocolate melts off or is to thick in places. This goes either way with cake balls or the cake pops. Any help with that?
Thanks!
Hi Amy! The chocolate falls off the ball? Does it melt or crack? If it’s melting, then the room temperature is probably too hot and not allowing the coating to set. Also, are you using CandiQuik or another coating? If you happen to have a picture that would help a lot – otherwise I’ll try to answer as best as I can. If the chocolate is dull, this can be from overheating (and possibly humidity) as well…Also, if it is not smooth, it could be that there are tiny little pieces of the coating that became too hot or were affected by the humidity. I would try adding Crisco or solid vegetable shortening (even vegetable oil) to the coating and see if this helps. Also – when dipping – make sure you let the excess chocolate drip off before placing in the styrofoam (for cake pops) or on wax paper (cake balls). Lastly, make sure that the mixture of the cake and frosting is thoroughly mixed so that the frosting is evenly distributed in the cake. Talk soon!
Do you tap the excess chocolate off?
Yes, I do. I allow the excess to drip off and lightly tap my hand to encourage the dripping. Hope this helps, thanks!
By falling off, I mean the excess falls off but when I set the cake ball or pop down on the wax paper, the excess still tends to slide downwards. I dip the cake ball out of the chocolate with a spoon and I even pass the cake ball from spoon to spoon to knock off the excess, but again, when I sit the ball down, there is still a puddle of chocolate. Kind like my cake ball has a little shelf all on its own.
Ahh yes! This does happen a lot with cake balls – they form almost a “foot”. The best way to avoid this is to use a spoon to dip the cake ball – just as you are, but I even go as far as wiping the bottom along the side of the bowl (or tray) I am using to dip them in. Even so, there may be a little extra coating that pools near the bottom and in that case you can take a small paring knife and trim off the excess. OR, some people make them into cake pops and then remove them from the stick and seal up the hole with a little dab of candy coating. With the cake pops – in order to avoid the extra coating dripping down the stick, hold the stick at an angle and allow the coating to fall back into your bowl (this may take a minute or so) – watch the video by Bakerella I posted at the end of the blog post, she shows how this is done. Also, you can use the back of the spoon to “help” the coating fall off the stick, but be careful and only do this towards the bottom of the cake ball, because if you touch the cake portion at all, it will leave a blemish.
Thanks for the tips, I am using a Babycakes Cake Pop maker, but this advice is great for decorating the cake pops, I have not yet tried to make cake pops in my maker, I have been making other goodies though, like brownies and cornbread, etc. I found you via the Dwell on Joy Link Party.
Thanks for stopping by Tina! I haven’t used the babycakes brand specifically, but I’ve tried a cake pop pan made by Nordicware – it works well, but I’ve found you can roll them more perfectly by hand (plus, then you get frosting mixed in with them too- haha)! Thanks for sharing the ideas with other goodies in the pan- bite size foods are fun to eat and make!
Great cake pop tutorial for me! Thanks so much for sharing at Dwell on Fridays! I’m pinning for sure! Make sure to come by tomorrow to share your latest projects!
Thanks so much! Will stop by sometime today to share a treat
Thank you so much for your fabuous tips! I especially needed help with the smoothness of the pop and the coating. I actually have some cake pops waiting in the wings right now, ready to be dipped:)
No problem, Sue! Thanks for stopping by & good luck with your pops – practice makes perfect!
Can you reheat the coating? I have been using the almond bark by log house. It works well, but still unsure if I should reheat it. I have tried both ways. I usually work the balls in small batches so the coating won’t harden to fast. Next question, can I flavor the bark? If so what do I use? Next adventure in cake ball/pops is key lime. I think it would taste yummy with a little bit of lime in the coating. Thanks
Hi Clara! Yes, the coating can be reheated and reused multiple times. Just store in an airtight bag/container between uses. And yes it may be flavored using oil based flavorings! Check out the FAQ page for other tips/etc.
Thanks for stopping by
This tutorial really opened my eyes to some of the issues I’ve had with my cake pops. Thank you for posting this
Glad to hear!
I made my 1st attempt today at cake balls! And, looking on line for tips for next time. These are great tips! I can’t find an answer to this question though. Why are my cake balls gooey?? I bite into it and it’s like gooey frosting not fluffy cake? Did I put too much frosting in? Not cool the batter before rolling? My daughter make cake balls once that were delicious. Mine taste nothing like that!!
Hi Liz,
First off – yes, try less frosting…1/4 to 1/2 can should be more than enough. It also depends on the cake and frosting you use (and homemade vs box cakes/frostings). But try less frosting – see how little you can get away with using, you can always add more!
But typically cake pops are a lot more moist than say a slice of cake…unless of course you use those specialty pans that bake the cake into mini circles.
Hope this helps – thanks for stopping by!
Sarah
Help! I’ve made cake pops a couple of times and have been so grateful to all the online advice on how to melt the candy and to dip, etc. but there is one problem I’m experiencing that I can’t find the answer to. Why won’t my cake pops harden off once I’ve dipped them? I did an evening workshop at the shop in my village and proudly brought my cake pops home but the next morning they were still soft on the outside and not set hard like I’d expect them to – and like so many of the pictures in books and online look like. What am I doing wrong? Did we put too much veg oil into the melts? Too much frosting in the mix, creating too much moisture from the inside out? Would be very grateful for any advice…
Hi Carol,
My best guess is the humidity and/or the amount of oil you added or brand of coating you used. Make sure the cake pops are stored in a dry, cool place (but not in the fridge, this can cause condensation). Were you using CandiQuik Candy Coating? If you are using the melts, I unfortunately can’t answer that as I have never worked with them. You shouldn’t have to add veg oil to the CandiQuik if this is what you were using (the only time you have to thin it out is in high humidity conditions, and in that case – try a spoonful of Crisco solid vegetable shortening before using veg oil). How much frosting did you use? However, this shouldn’t cause any effect on the coating.
Hope this helps (somewhat)!
-Sarah
Hi Sarah – many thanks for such speedy advice. We were using Candy Melts. Based in UK so not sure where I can get hold of CandiQuik but will check online. Will try again and not use veg oil to thin – will use solid shortening if any. It wasn’t overly hot – sadly never does get massively hot here in UK… :D!
Hi again Carol, yes in that case my best guess would be that the coating was thinned out too much (only use about a teaspoon-tablespoon of oil/shortening per 16 oz. of candy coating)…and also, try only using about 8 oz. or less of frosting per 13×9 cake. Better luck next time!
Great article! I have been making Cake Pops for some time now, and have been pretty lucky to have always had an easy time with them its almost like second nature to me! But sometimes I have a hard time maintaining the smoothness of the freshly dipped Cake Pop and it is extremely frustrating! I have smooth Cake balls and know not to have the Cake Pops to cold and the Candy coating to hot for the dipping process but recently when I put dip my pops about 2-3 seconds into dipping I go to tap the excess chocolate off and my Pop almost freezes and looks as if it curdles
  I then have to tap the chocolate a bit harder to make it smooth again but its such a hassle. I don’t know what I’m doing wrong I think it may be due to moisture I put my cake balls under wax paper or sandwich wrap and cover it and put into the refrigerator until firm and when I take them out they always leave a wet mark under the cake ball could this be the issue to my curdling pops?? Or maybe just the combination of moisture and summer weather? HELPP!!! any tips would be greatly appreciated!

Hi Rose! I have had this happen, too. It almost looks as if the chocolate is wrinkling? I believe it is when the coating is too hot and then you dip a (somewhat) cool cake ball in it. Always let the coating sit for a minute or two before dipping. Also, if there is too much oil that has pooled up at the base of the cake pop, use a paper towel to wipe it dry. Hope this helps! -Sarah
Thanks for your tips, they are fabulous!
Can you tell me what brand you use of edible markers.
I ahve not found a brand that writes that well on the chocolate.
Thanks
Hi Debbie!! The ONLY brand I have found that works is Americolor Gourmet Writer (http://www.amazon.com/Gourmet-Writer-Decorator-Assorted-Colors/dp/B0012DMI1S)- They work great and come in plenty of colors, just make sure to wipe the tip off if any candy coating gets on it, and store them with the tip pointing down Thanks for stopping by!
Hello! Someone in my Facebook friends shared
this website with me so I came to give it a look. I’m definitely loving this information. I’m book-marking and will be tweeting this to
my followers! Fantastic blog and excellent design and style.
What a great tutorial! Thank you!
Thank you!! Thanks for putting it on the Edible Artists Network site, glad you found my tutorial and commented because I’m excited to join your site now!
Hi Sarah,
If I use cream cheese frosting for a red velvet cake ball, do I need to store it in the fridge? My friend’s party is on Saturday and I was planning to make the cake balls tomorrow night.
Thanks.
Hi Candice, is it homemade cream cheese frosting or is it the canned frosting? If it’s the canned frosting – I wouldn’t worry about it! Just make sure they are stored in a cool/dry place :). I do worry that the fridge would cause condensation on the chocolate coating – when I have had to place them in the fridge, just make sure they are in a low moisture part and you can even place them on a paper towel to absorb any excess moisture! Hope this helps.
I have a recipe question I saw the Turtle Cheesecake on Twin Cities Live today and the recipe did not specify if you prepared the pudding first ? or used it dry . Also how many pieces of Turtle candy , are the packages the individual 2 piece ones so you have six pieces ? Thanks
Hi Reva, http://candiquik.com/?recipe=turtle-cheesecake
Thanks for stopping by! We just poured the DRY cheesecake pudding mixture in and mixed it that way. For the turtle candies (I used DeMet’s), and chopped up 4 small candies…of course you can use more or less, just adjust according to your taste! Here are a couple links to the recipe again, one I did on the blog and one is on the website
http://blog.candiquik.com/?p=817
-Let me know if you have any other questions!
i can make the cake po perfectly and the frosting stys and the pop doesnt fall off but i cant seem to decorate no matter how manys time i try
Hi there! Wonderful tutorial! I haven’t heard of Candi quick. I use chocolate chips. We have 2 children that have peanut allergies so i don’t take any chances. Lol. So yeah, I use Choco chips. Mine don’t dry though quickly. When i dip them that is. I have such a hard time making cake pops. Usually use my babycakes maker, but really want to do it this way, with the frosting. They always fall off. Someone suggested freezing them a bit first. Would you suggest that?
Hi there! Thank you very much. Candiquik is a quality candy coating and it is perfect for candy making, coating pretty much anything, and works awesome on cake pops. you can see more about it on the website here: http://www.candiquik.com. And actually Candiquik is produced in a peanut-free facility. Our old packaging still lists the peanut warning because a long time ago it used to be stored in a building that also stored peanut butter chips. The new packaging will have the updated changes – it is peanut free! You can find Candiquik at Target, Walmart and plenty of other grocery stores in the baking aisle (if you let me know your zip code I can check other grocery stores).
And to answer your question about the freezing, you can certainly do this to harden them a bit, but I would NOT recommend completely freezing them. Also, you don’t want them too cold because then you can start to have cracking. Using the chocolate chips is why it isn’t drying nicely and also, since choc chips are fairly thick when melted, this can pull the cake ball off the stick. Try rolling the cake balls smaller and mixing the cake VERY well w/ the frosting then using candy coating – this should help the issue of them falling off the stick. Hope this helps! Thank you.
Great! Thank you! My zip is 56649. I should be going out of town soon so I can hopefully get some candiquik. That is so awesome they are peanut free. Makes this Momma happy. It gets pretty difficult to get peanut free stuff.
I see Walmart carries them in Bemdji. I will hopefully be going there soon. What about almond bark? Would that be the same as choc chips? Or would it be better? I have a cake ready to make them. Lol.
Hi Sarah, sorry I didn’t get back to you about the zip code immediately – I was away from a computer! Glad the almond bark worked, Log House Foods (manufacturer of CandiQuik) makes almond bark too – Candiquik is just the premium version of an almond bark (+ Candiquik comes in it’s own microwaveable tray)! For future reference you can find CandiQuik at Walmart, Target – otherwise Hugo’s has it, but I think that is quite a drive. Thanks!
Sorry to reply again…Lol. I ended up using the almond bark. I followed all your tips to make them and I have to say, these are by far the best cake pops I have ever made. I used almond joy frosting for the frosting to make the cake balls and the chocolate almond bark worked so much more perfectly then choc chips. Thank you so much for the tips. Without you they would not have turned out!
Don’t be sorry!! I love comments ;). SO glad they turned out! Practice makes perfect, I’m sure they will get better and better as you will find out what works best for you.
Hi! i was just wondering how and what you use to decorate the cake pops?
Hi! In the photos in this post I used the Candiquik to decorate the cake pops. I used it in a piping bag with a very tiny hole and piped on the designs. Hope this helps. Please check back as I plan on posting video tutorials on how exactly to do this! Thanks!
Hi! First, let me say thank you for taking the time to put up this tutorial!!
I make my cake pops in a baking pan, so I do not add the frosting to the cake itself. I’m wondering if I will be able to do the coating as you have suggested in your tutorial… I have tried using chocolate chips, white chocolate chips and almond bark but seem to have problems with it not being thin enough to turn out smooth. I have added oil to thin it but always fear it tasting like oil so I don’t add a whole lot. :-/
Hi Katie,
Thanks for the comment! With the cake pops you made (in a baking pan), you will still be able to coat these the same way. Chocolate chips are not the best thing to use for this – they can be very temperamental, you have to add shortening to thin them out, melt in a double boiler, and they won’t get that nice “shell” unless you add paraffin wax to them (in other words, it’s a pain in the b). Almond bark or Candiquik is what almost everyone uses to coat their cake pops. Candiquik is similar to an almond bark, but think of it as a higher-quality bark – it uses finer refined sugars, is naturally flavored and includes more milk products and real cocoa. It also melts nicer and has a better consistency than most barks. You will notice the taste difference right away. If you are using a bark and find it’s still too thick, add a spoonful of Crisco (or solid vegetable shortening) to the melted bark. You shouldn’t have to add anything to the Candiquik when dipping your pops. Hope this helps!
Thanks,
Sarah
Thanks Sarah! I will give it a shot as you suggest and forget the chips!
I like your idea about using Greek yogurt or applesauce instead of oil! I discovered (by default) butter instead of oil works great against my cracking, oil leaking, smooth coverage problems… Plus they taste great!
Hi Shannon,
I do that sometimes too! It’s a great trick to make a boxed cake taste more homemade. Thanks for stopping by!
How long do cake pops lasts at room temperature? Do they need to be at the fridge?I use betty crocker frosting plus cream cheese to make them.Thanks!
Hi Michelle, if you are using cream cheese in them, I would definitely refrigerate them. They should last at least one week that way! (Tip: if you can wait to dip them, I would. Sometimes the chocolate shell can get sticky from the condensation in the fridge. Not a huge deal, unless they are for an event…) Hope this helps! Thanks.
Hi Sarah….
I have problems with cracking……not initially, but when I go back and pipe chocolate swirls on after?
My initial coating is fine…..most times……I’ll cover a whole batch, then go back with my different coloured chocolate to pipe patterns…….it then that the cracks appear?….any help would be greatly appreciated.
Many thanks
Hi. Help! I live in a hot & humid climate. And making my cakepops was a bit harder than usual because everything was quick to warm down due to the warm weather. Furthermore, the coating was always runny & kept pooling. So I resulted in spooning the coating & kept it thin. My question is, due to the hot weather & humidity, is it ok to still keep the finished product in room tempt? Or could i refrigerate them? Im afraid they’ll all get soft & mushy then fall off the stick. Or worse, ants & other insects might get at it.
Hi there! It depends on HOW hot and humid it is….if the chocolate coating won’t melt, I would keep them in an airtight container in the coolest/dryest place in your home. I worry about refrigeration because they can get condensation on them. If you do have to refrigerate them, keep them in an airtight container in the fridge and place a paper towel in with them to absorb any moisture that may build up on their chocolate shell. Hope this helps! Thanks!
Hi! I need help! I’m making mickey mouse cake pops for a 1 year old party and I put the ears in with chocolate(as if it were glue) and then I melted the red chocolate to put over the entire cake pop and I added canola oil to the chocolate thinking it would make it thinner. After I spooned the chocolate onto the cake pop and held it upside down so the excess would drip off. It was still dripping off and it would harden before all of it would drip off. I don’t understand what I did to the chocolate, I’m thinking I heated it for too long. But also when it hardened it was lumpy on the cake pop. One person was telling me to dip the cake pop into the chocolate and not spoon it on, but I feel like if i do this then the cake pop will just fall off the stick? HELP!!
Hi there!
Hopefully I can help. Here are my tips:
*If you are trying to thin out your red chocolate, I would recommend using Crisco (solid vegetable shortening) VS canola oil.
*I would NOT spoon the chocolate onto the cake pop – you will never get it quite as smooth this way. I would pour the chocolate into a deep cup and hold the end of the stick, dip it in and pull it immediately out (a large coffee mug or measuring cup works great, just make sure you can dip the entire cake pop in without hitting the cake pop on the bottom of the cup). You can then hold the cake pop up at a slight angle and allow the chocolate to drip off towards the bottom of the stick.
*I think you could have overheated the chocolate if there were lumps in it.
*It helps to chill the cake pops when dipping. But again, as mentioned in the tutorial, you can’t completely freeze them, but make sure they are cool to the touch (warm cake pops will fall off the stick). Also, dip the stick in the chocolate prior to inserting it in the cake ball.
Let me know if I can give any other advice. Thank you!
Thanks for finally writing about > Common Cake Pop Issues &
Tutorial | MISS CANDIQUIK < Loved it!
brilliant just brilliant post! Thank you for sharing these tips!! x
This is a cool cake pop and it also looks good and really want to eat it!
Have you ever used just melted chocolate chips or chocolate chunks as the coating? Do you think it would work?
Hi Anna, yes, I have. I highly recommend the coating – it hardens MUCH faster and smoother. Here is a good article on what type of chocolate to use for what: http://www.lovefromtheoven.com/2012/01/14/melting-chocolate-to-make-cake-pops-chocolate-pretzels-chocolate-covered-marshmallows-and-more/
Hope this helps! Thanks for stopping by
I will be trying out cake balls soon. I purchased some products by Sweet Creations to help. I think this will be exciting project. What type of icing do you suggest to use to decorate the balls with. Or would you use the CANDIQUIK to do that?
Amber
Hi Amber, I always use the Candiquik because it’s easier to work with and hardens/dries really fast. Thanks for commenting!
Hi!
First off I love this post! Great tips. I never made cake pops before but I have to make them for a bridal shower this week and I’m super nervous. I live in Canada so I’m trying to find Candiquik but from a quick search on google I don’t think we have them here… =/
OK, so I can not get the dipping part down pat. I have research and found this sight VERY helpful. My main problem is when I dip the cake balls in the chocolate the chocolate layers on to thick and heavy. I have tried to dip fast, dip slow, dip in deep dish but there is to much chocolate every time! UGH. Any suggestions?
Hi Heather, thanks for the comment. That’s strange that it’s too thick – make sure that you are not overheating the coating, this can cause it to become thick and clumpy. Otherwise, you can thin out the coating by adding a tablespoon or so of Crisco to the melted coating. Here is a link to a video (https://www.youtube.com/watch?v=oFRYwkuMlXM) showing how I typically dip cake pops, truffles, and other treats. I recommend using a deep cup/bowl when dipping cake pops. Let me know if you have any other questions. Thanks!
Thank you so much for this tutorial! I always wanted to make cake pops but they seemed so difficult to make. Just had a couple of questions: So after you mix the cake with frosting, you leave it in the fridge for TWO HOURS? and after this, do you take out the whole batch from the fridge when you are ready to put the stick on and coat it? or do you remove them small batches? Also, what size is the coffee scoop? How many cake pops will 1 whole box of cake mix make? Thanks again for your help!
Thank you so much for your tutorial! Ive always wanted to try and make cake pops, but it seemed so difficult. Just had a few questions: So after youve mixed the cake and frosting, you leave it in the fridge for TWO HOURS? when you put the lollipop sticks on, do you remove the whole batch of pops from the fridge or do you only work with small batches at a time? What size is the coffee scoop? Are you measuring it flat on the scoop or rounded? And one box of cake makes about 40 pops? Thanks again for all your help!
Hi Judy,
Thanks for commenting! Yes, one cake makes about 40 cake balls…depending on how big or small you make them of course ;). Also, once you mix the cake and frosting and roll it into balls, place them in the fridge for about two hours – depending on how cool the cake was when you mixed with the frosting. You can also mix the cake and frosting, then put in the fridge and later roll into balls, either way is fine. Then when dipping, I remove about a dozen or so at a time to dip. If they start acting funny, losing their shape or falling off the stick you know the cake balls are either getting too warm or the coating is beginning to get too cool (or they were not mixed together well enough). The coffee scoop I use is about 3/4″-1″ deep. A good size is a 1″ round cake ball (the coating adds quite a bit on top, too). Hope this helps! Thanks, Sarah
Hi! Great quick fix blog! This is my first time on your page and I have already found tons of helpful tips. I do have a question for you. Yesterday was the 2nd time I tried at cake pops, The cracking occurred, and thanks to your blog, I now know why. However the other thing that happened that didn’t happen the 1st time I made cake pops, it that when the candy dried and hardened, it did not have a smooth look. I don’t mean texturally. Some of my pops took on an old look to the color. The best description I have is…when chocolate sits too long and gets old, it has some sort of white look to the chocolate. The finish on my candy has that sort of look. What could it be? I’d be happy to post a picture of what it looks like, but I don’t know if your blog allows it. Any help would be appreciated. Keep up the amazing job!
Hi Eli,
Thanks for the comment. I know exactly what you are talking about. This can often happen if the coating is older and the oils have begun to seperate or again, if it has been slightly overheated. Do you have the package (is it Candiquik?) and the date code on it – I might be able to help further.
Thanks!
Sarah
Sarah,
Ah! I see, I wonder if I may have overheated it. I usually melt the candy melts in the microwave in 30 second intervals at half power and stir thoroughly in between. I did not use candyquik. In fact, I can’t say that I have seen that product in my area. The candy melts I used are Wilton. I could not locate an expiration date. Do candy melts expire?
Thanks again!
Hi Eli,
I’m not even sure with the candy melts as I never use them. I know they can be quite a bit thicker when melted even – making it hard to dip. But Candiquik can be found at Target and Walmart in the baking aisle :). Good luck!
Excellent! Thank you.
wow!!! your tips are brilliant, they have helped me alot…..
I am making one direction pop cakes for my niece, what would you use to do their hair? I have writing icing…. would that work? would be really grateful for your advice
Thank You.
Hi Pauline,
thanks for the comment! I would actually use candy coating. You can put it in a heavy duty plastic ziploc bag and cut a tiny hole in one corner and use this to pipe on the hair. Writing icing may work but it takes forever to dry and can be difficult to control when piping on. Hope this helps!
p.s. if you do a google search for “people cake pops”, you will see lots of images of how others have done hair and all of them have used coating it looks like!
THANK YOU SO MUCH! I just made hulk fist cake pops, and it was my very first time making cake pops. I couldn’t figure out why everything was going so HORRIBLY and this entire post just saved me from baker’s depression.
You are a saint
I made these for my daughter’s birthday this weekend and used this exact recipe and they were delicious!!! Everyone loved them and we only had two left at the end of the party. The texture of the cake turns out to be like a fudgey brownie, which is a great contrast to the hard chocolate shell. I will admit I have issues with weird textures so I was a little nervous about the cake being crumbled and then put back together with the cream cheese, confectioners sugar mixture, but it was amazingly yummy! I used Wilton’s Candy Dips for the coating in light cocoa and white and they were perfect. I bought the tubs that came with the candies in them and melted it in the microwave, super easy. Because of how moist the cake is, I found that it works best to freeze the cake pops until they are truly hard and nice and cold, that way the weight and warmth of the coating will not cause the pops to come off the sticks. Also, the cold pops cause the coating to harden quickly so you have to decorate fast, but that also means no drips! I also loved that I could start this in the middle of the week and take several days to finish it, I typically dread making cupcakes or a cake because it turns into a marathon of mixing, baking and decorating that is tedious and exhausting. This allowed me to spend about an hour each day and I finished the day before the party and didn’t have to stress or rush the day of the party! I will definitely make these again!! Oh and this recipe made 48 2 inch balls!